The Stellaris 8 Confocal Microscope has a 405 nm laser, a white light laser (WLL), tunable between 440-790 nm and 6 objectives (10x/0.30, 20x/0.40, 20x/0.75, 40x/0.80, 40x/1.25 GLYC, 63x/1.40 OIL)
The Leica Stellaris 8 confocal microscope is capable of transmission (scanning mode, non-confocal), camera-based bright field transmission, and fluorescent imaging (using DAPI, FITC, FITC LP, and TXR filter cubes), as well as confocal fluorescence imaging with white light laser (WLL) excitation (featuring 5 spectral detectors).
Fluorescence lifetime measurements can be performed in two modes (TauSense and FALCON) using an excitable laser selectable between 440 nm and 790 nm. Long-term measurements are supported by the Adaptive Focus Control function and the OKOlab incubator, which provides temperature and CO2 regulation.
Currently available modules (FCS available for a short trial period):
Switch On
- If the PC was not on, it takes a few minutes
- log in automatically with the Leica-user, no password
- Do NOT use USB sticks!
We go down from the top, with a 15 second break!
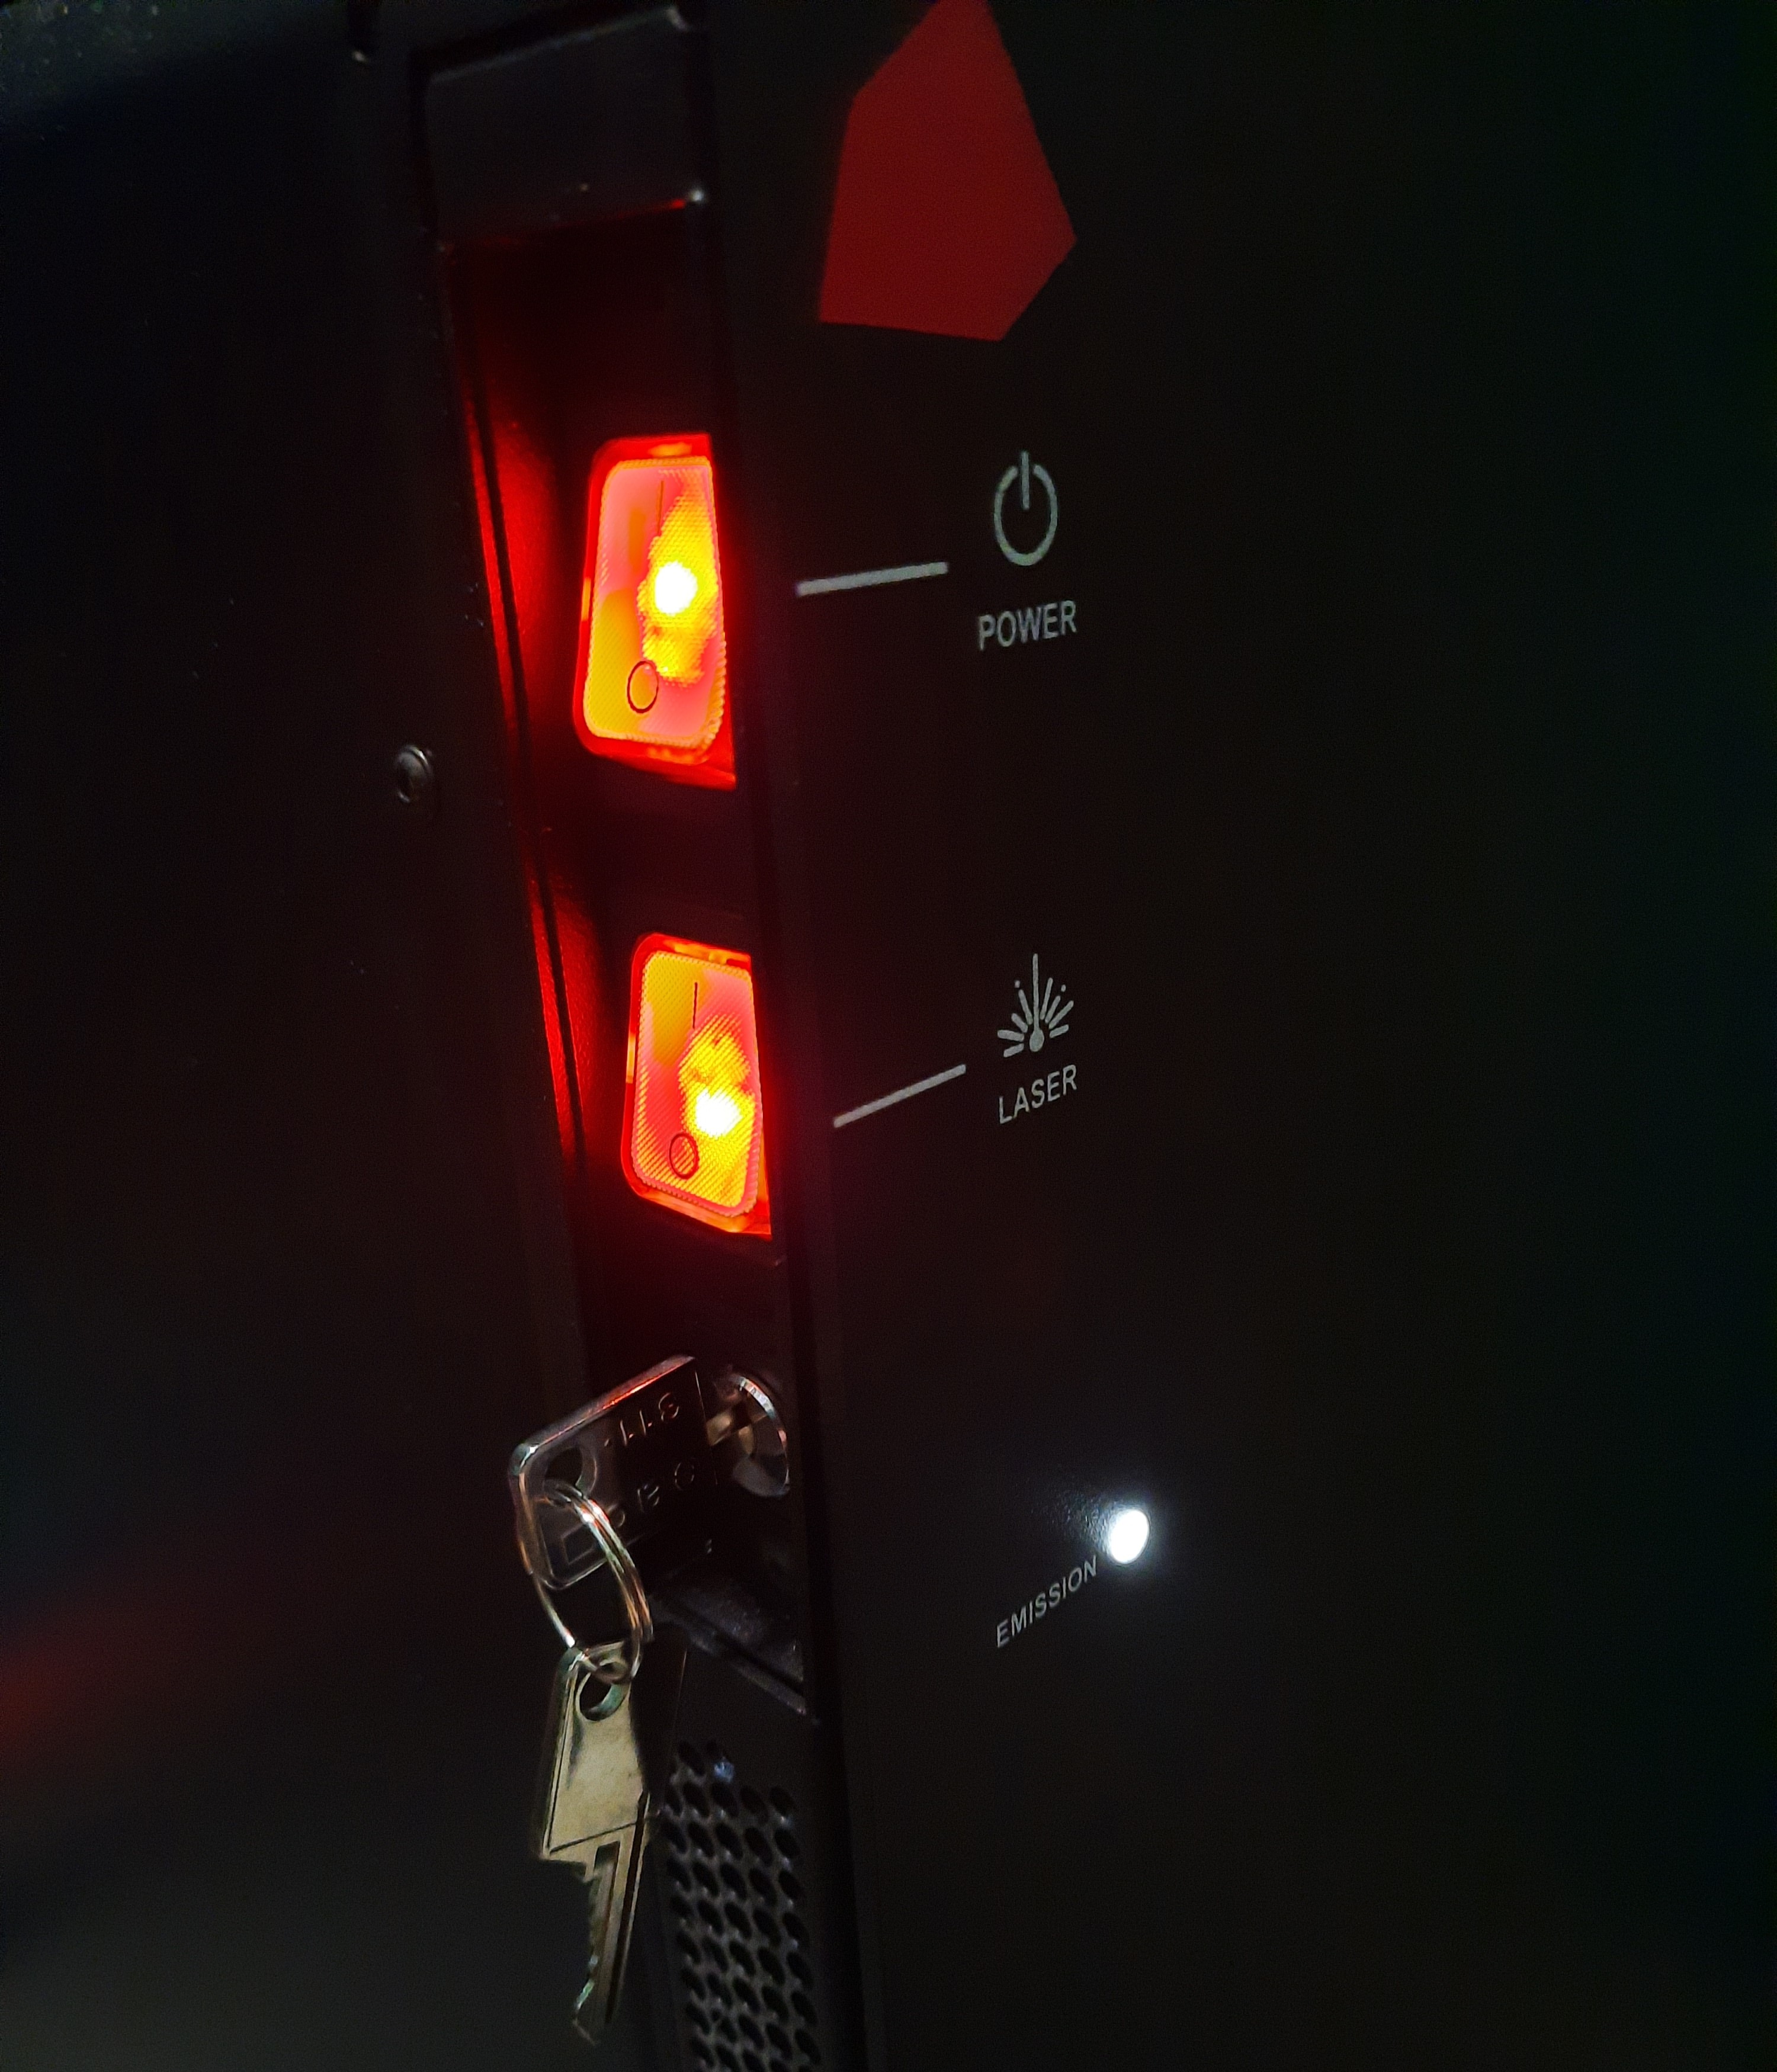
- power switch
- laser switch
- key
- Small fuses on the wall: 3 and 4; 5 CO2 - only what you need
- Gas bottle opens, pressure regulator to 1.5-2 atm
- Touchpad on for a long time
- Map your network drive (e.g. \\st1.brc\home or \\st18.brc\BOSSNAMEgr - "18" may be changed)
Remember to write SAMDOM\ before your username
Please, don't store anything for a long time on this computer. (We can't take responsibility for the local data. - Login for using the microscope.
- Switch the microscope controller on (it takes about 40s)
- Connect the red marked coax connector of the stage (they are on the table)
- Switch on the fluorescent lamp, if you need (under the controller box)
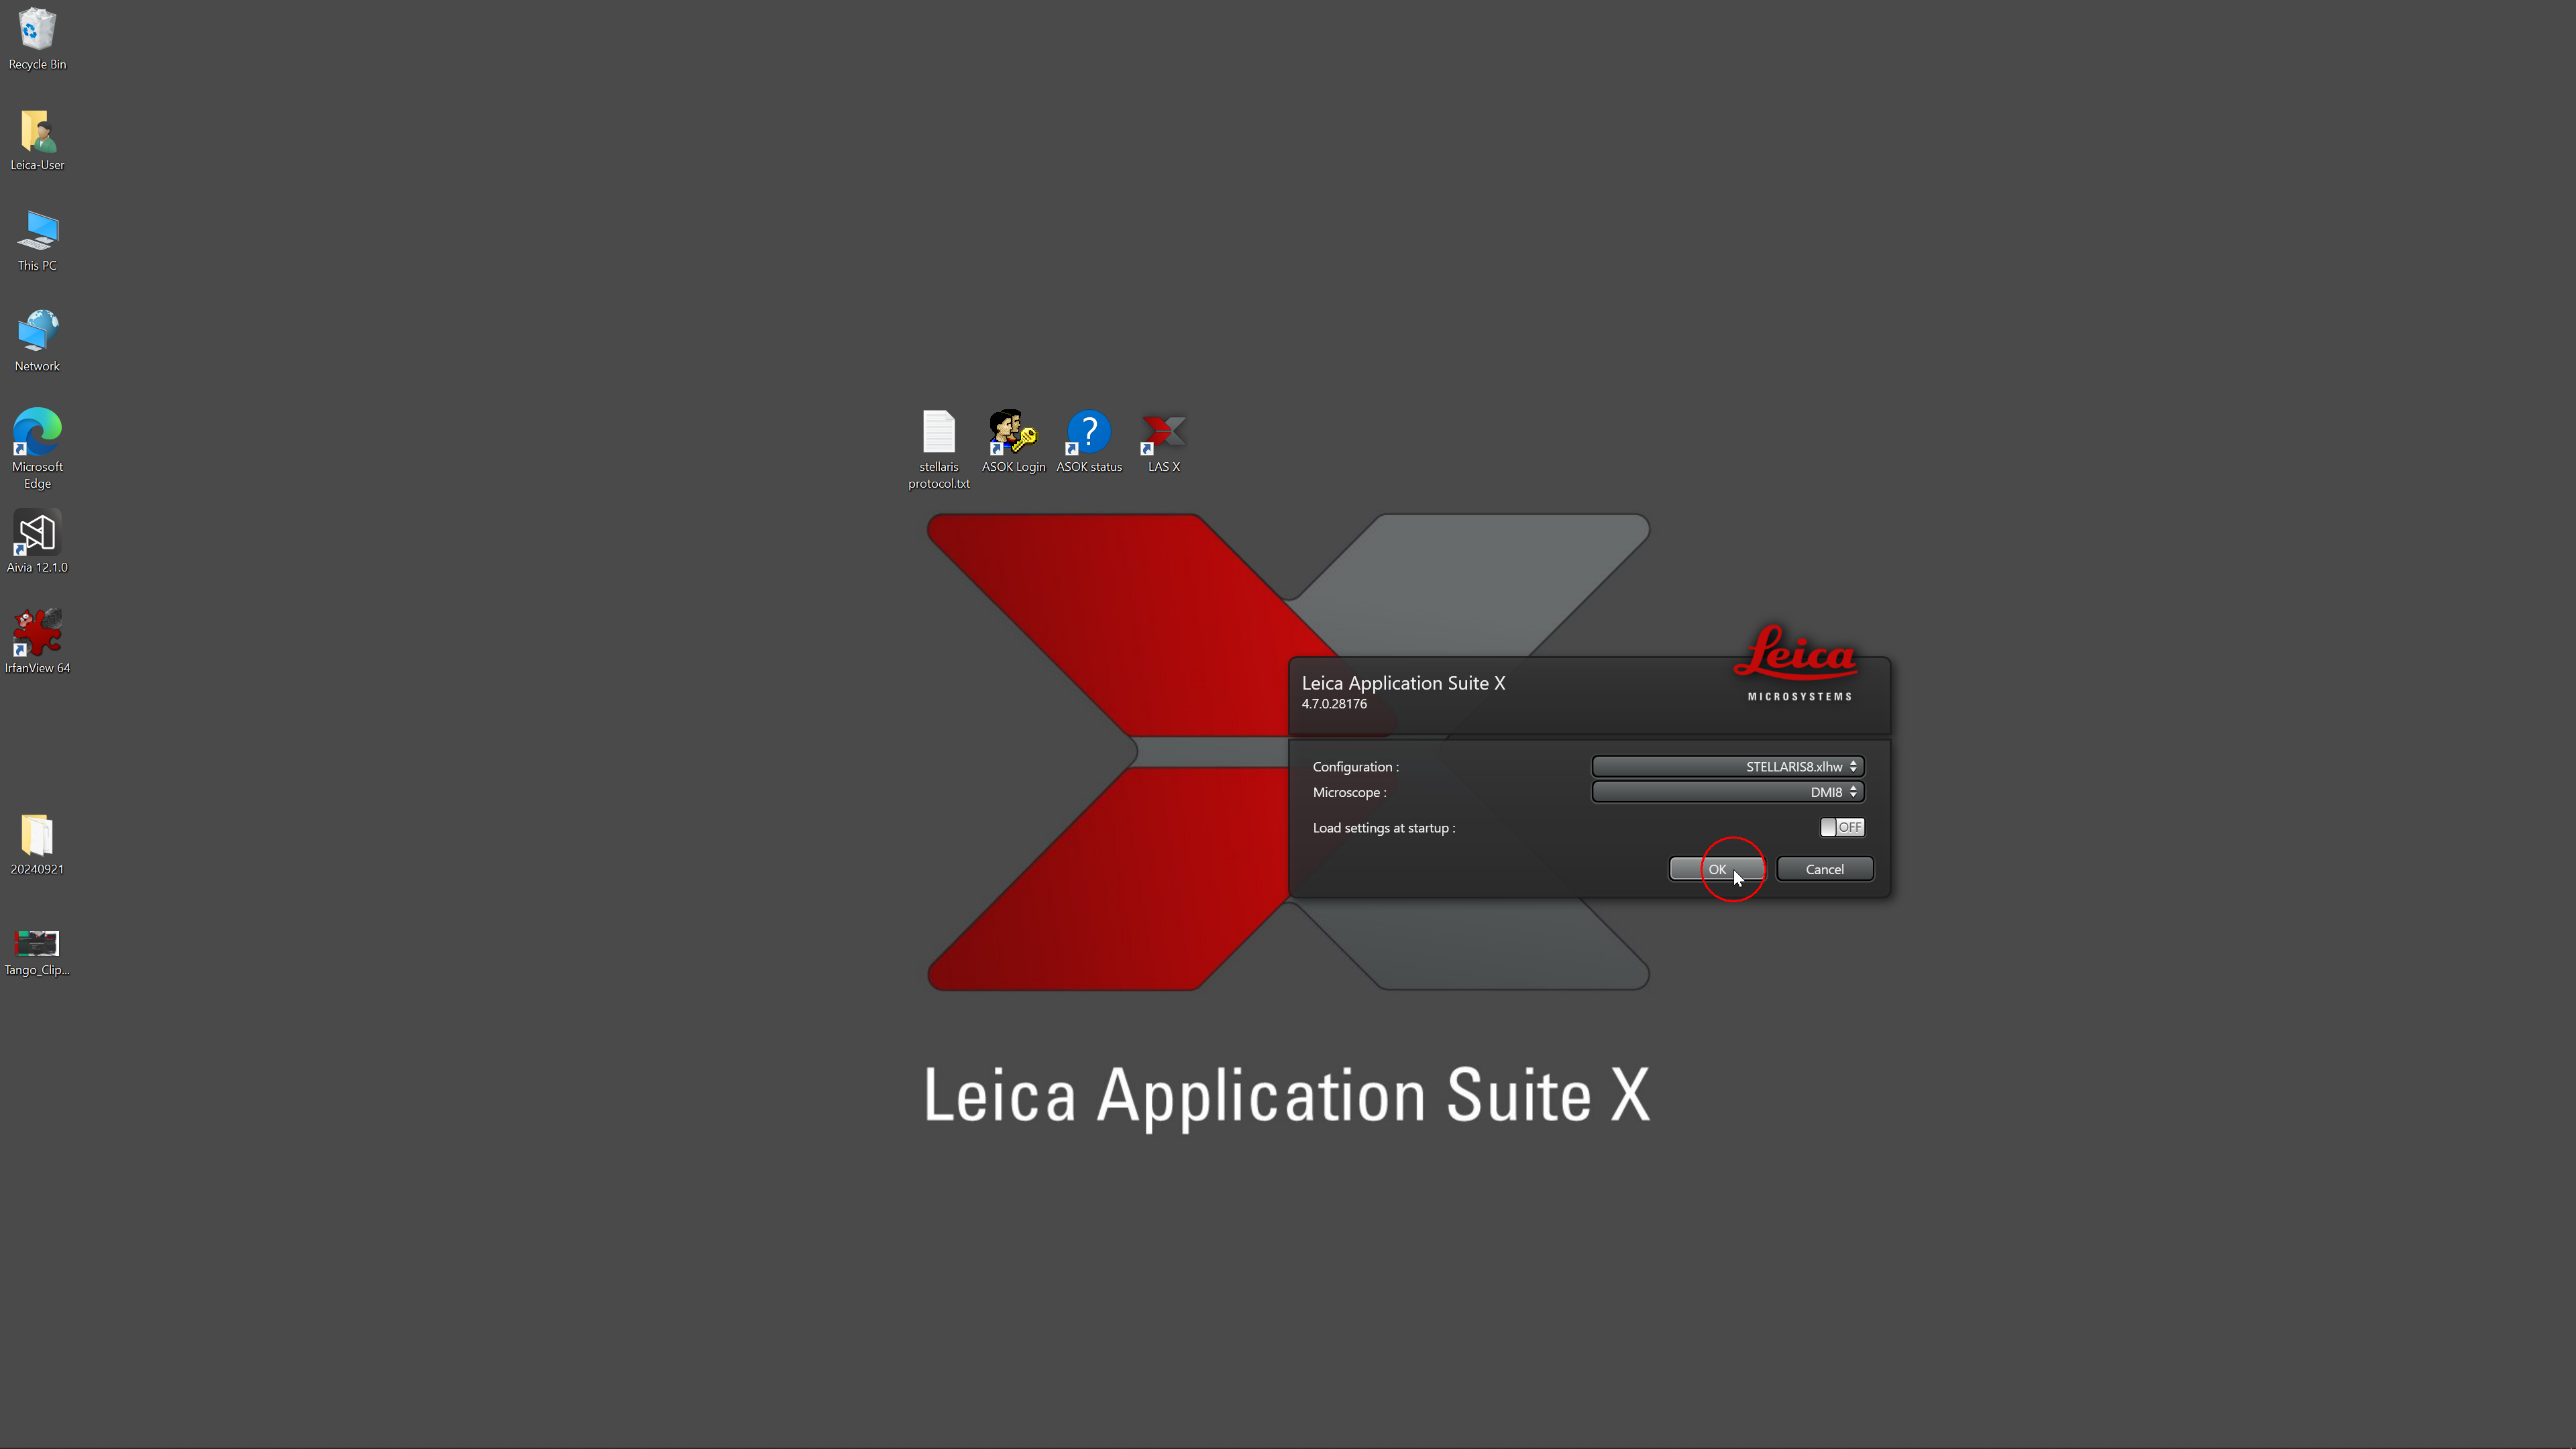
- Start the LAS-X software (be patient ;-) ) - set "STELLARIS8", "DMI8" and "Load... OFF"
Initialize
You may be ased for initialize the stage.
Before the stage initiation, make sure the stage can move freely:
make free the tower (open the OKOlab chamber's top cover) and tilt it back.
Before the stage initiation, make sure the stage can move freely:
make free the tower (open the OKOlab chamber's top cover) and tilt it back.
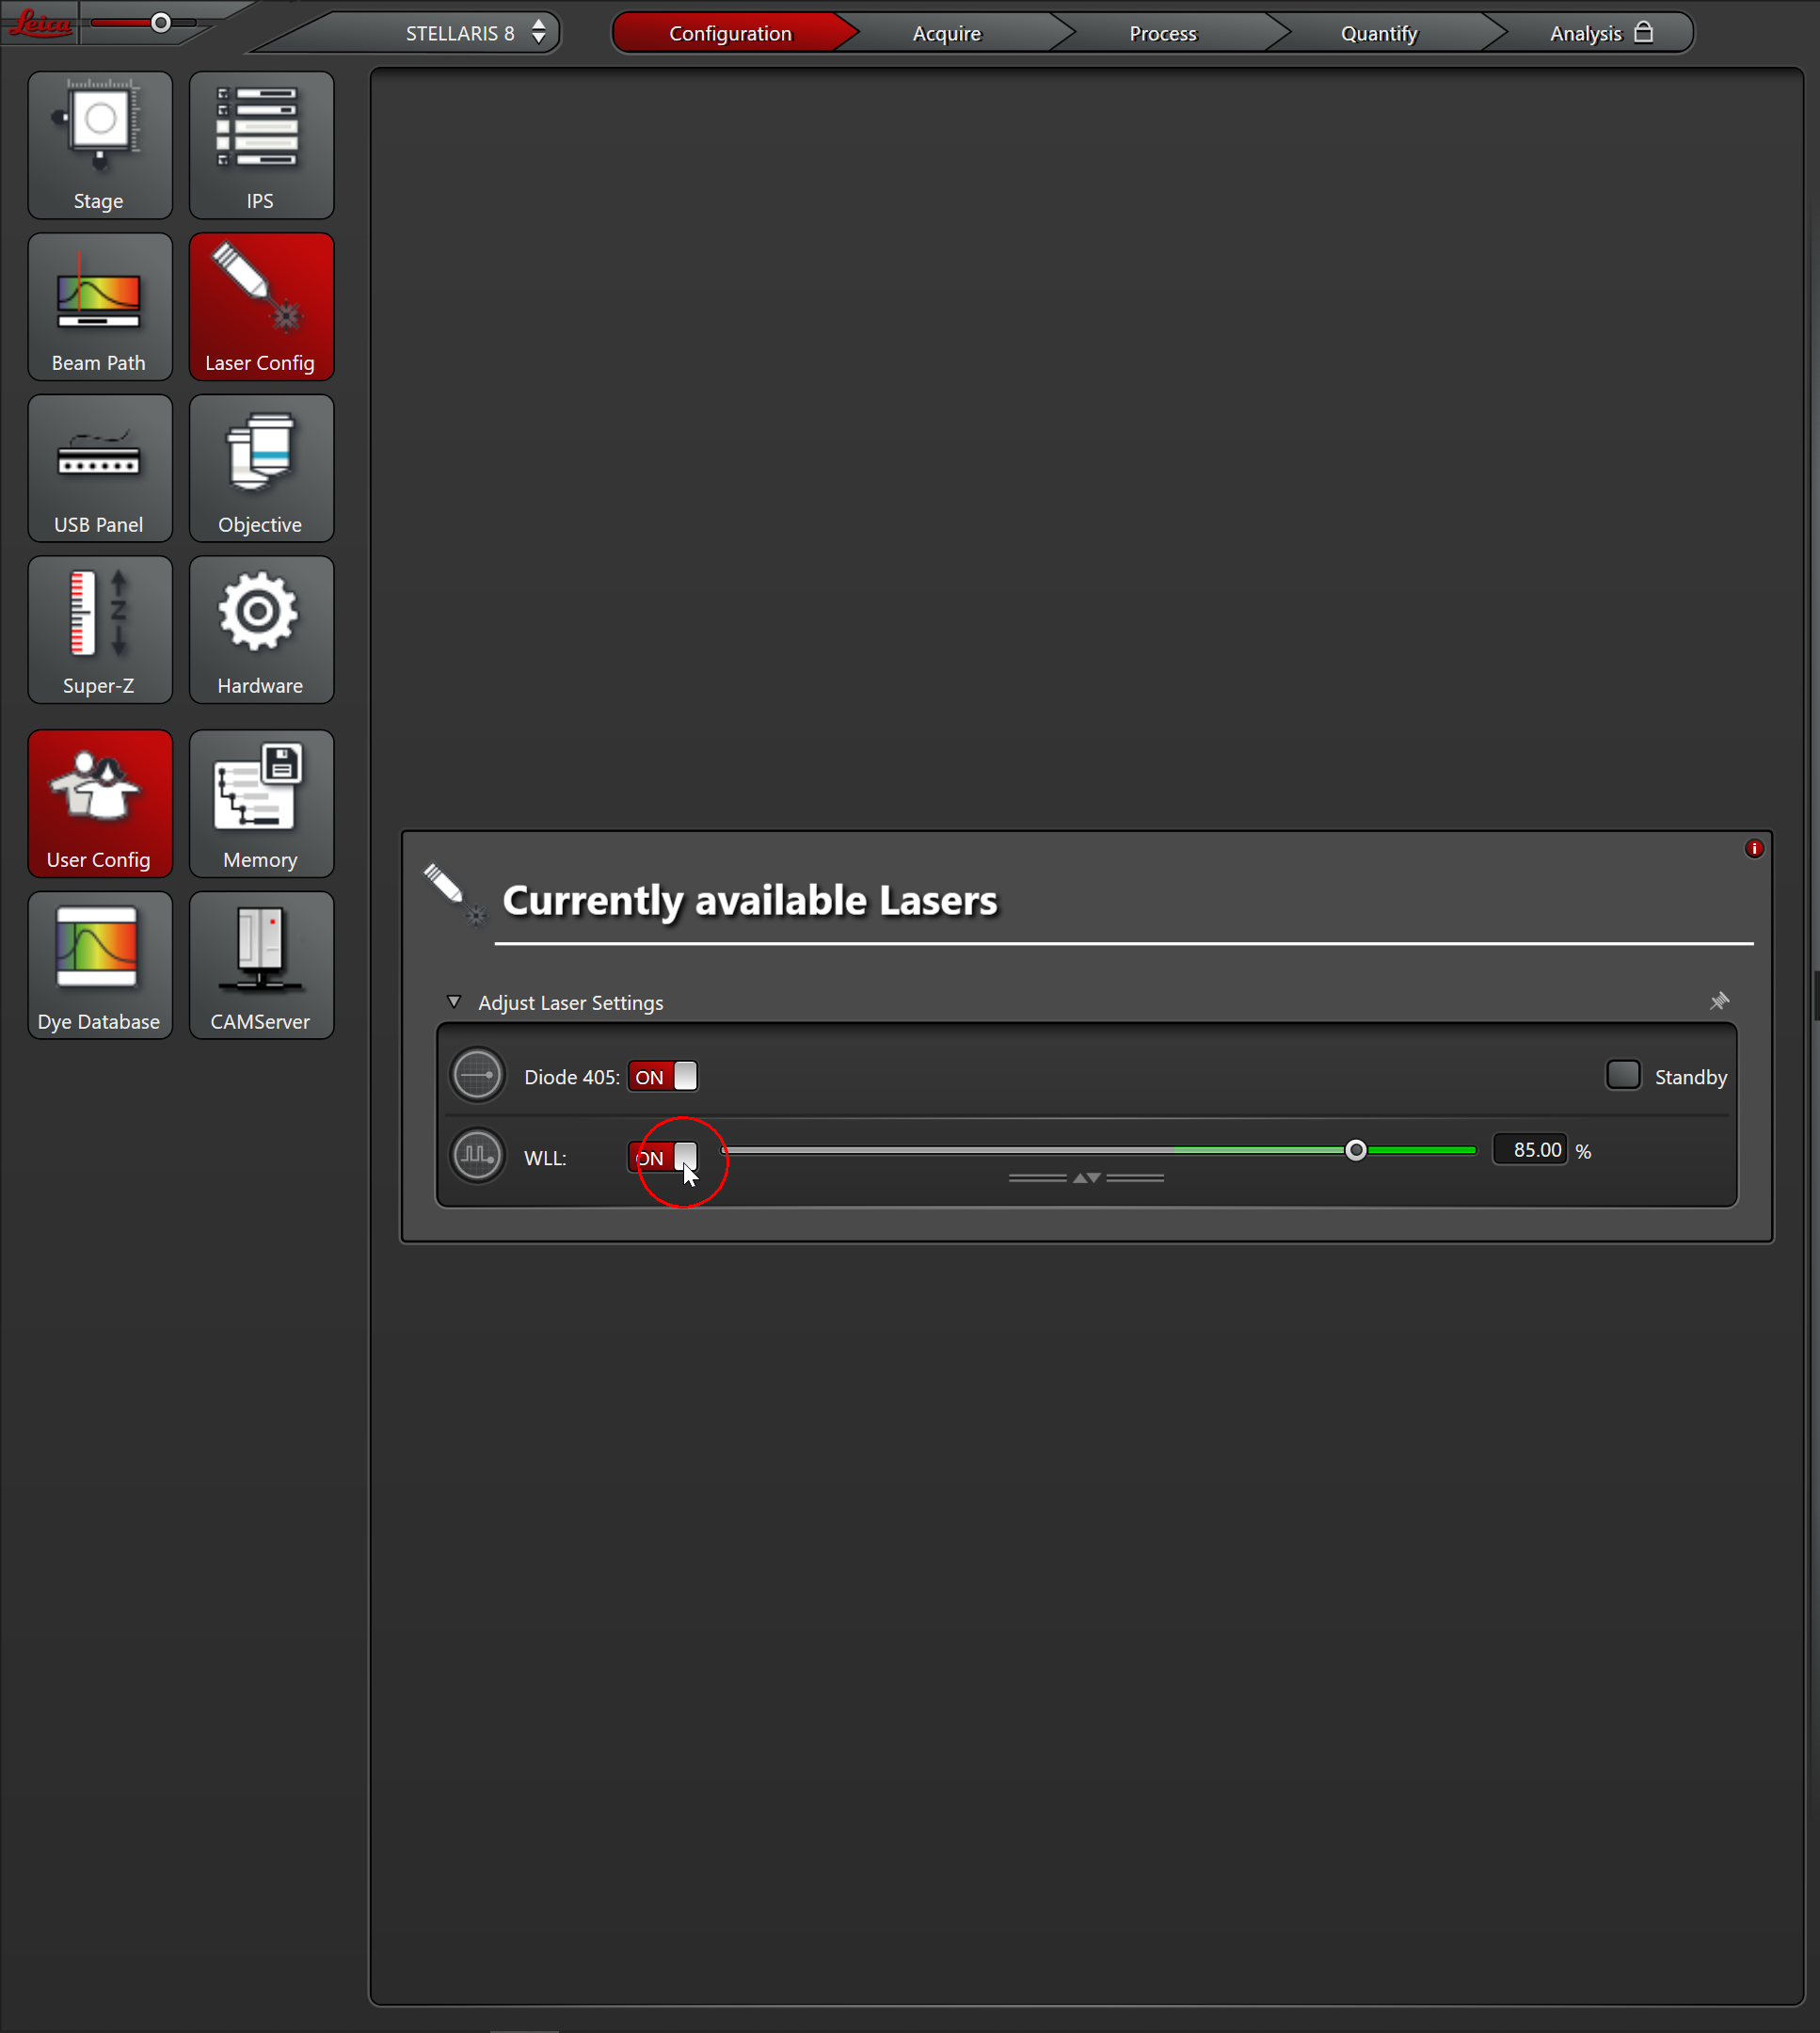
Turn on the lasers (patiently): Diode 405 and WLL.
IPS - Load - E:\CILab\LEICA FULL APPLY SETTINGS.xml
USB panel - Leica Settings - XYZ move
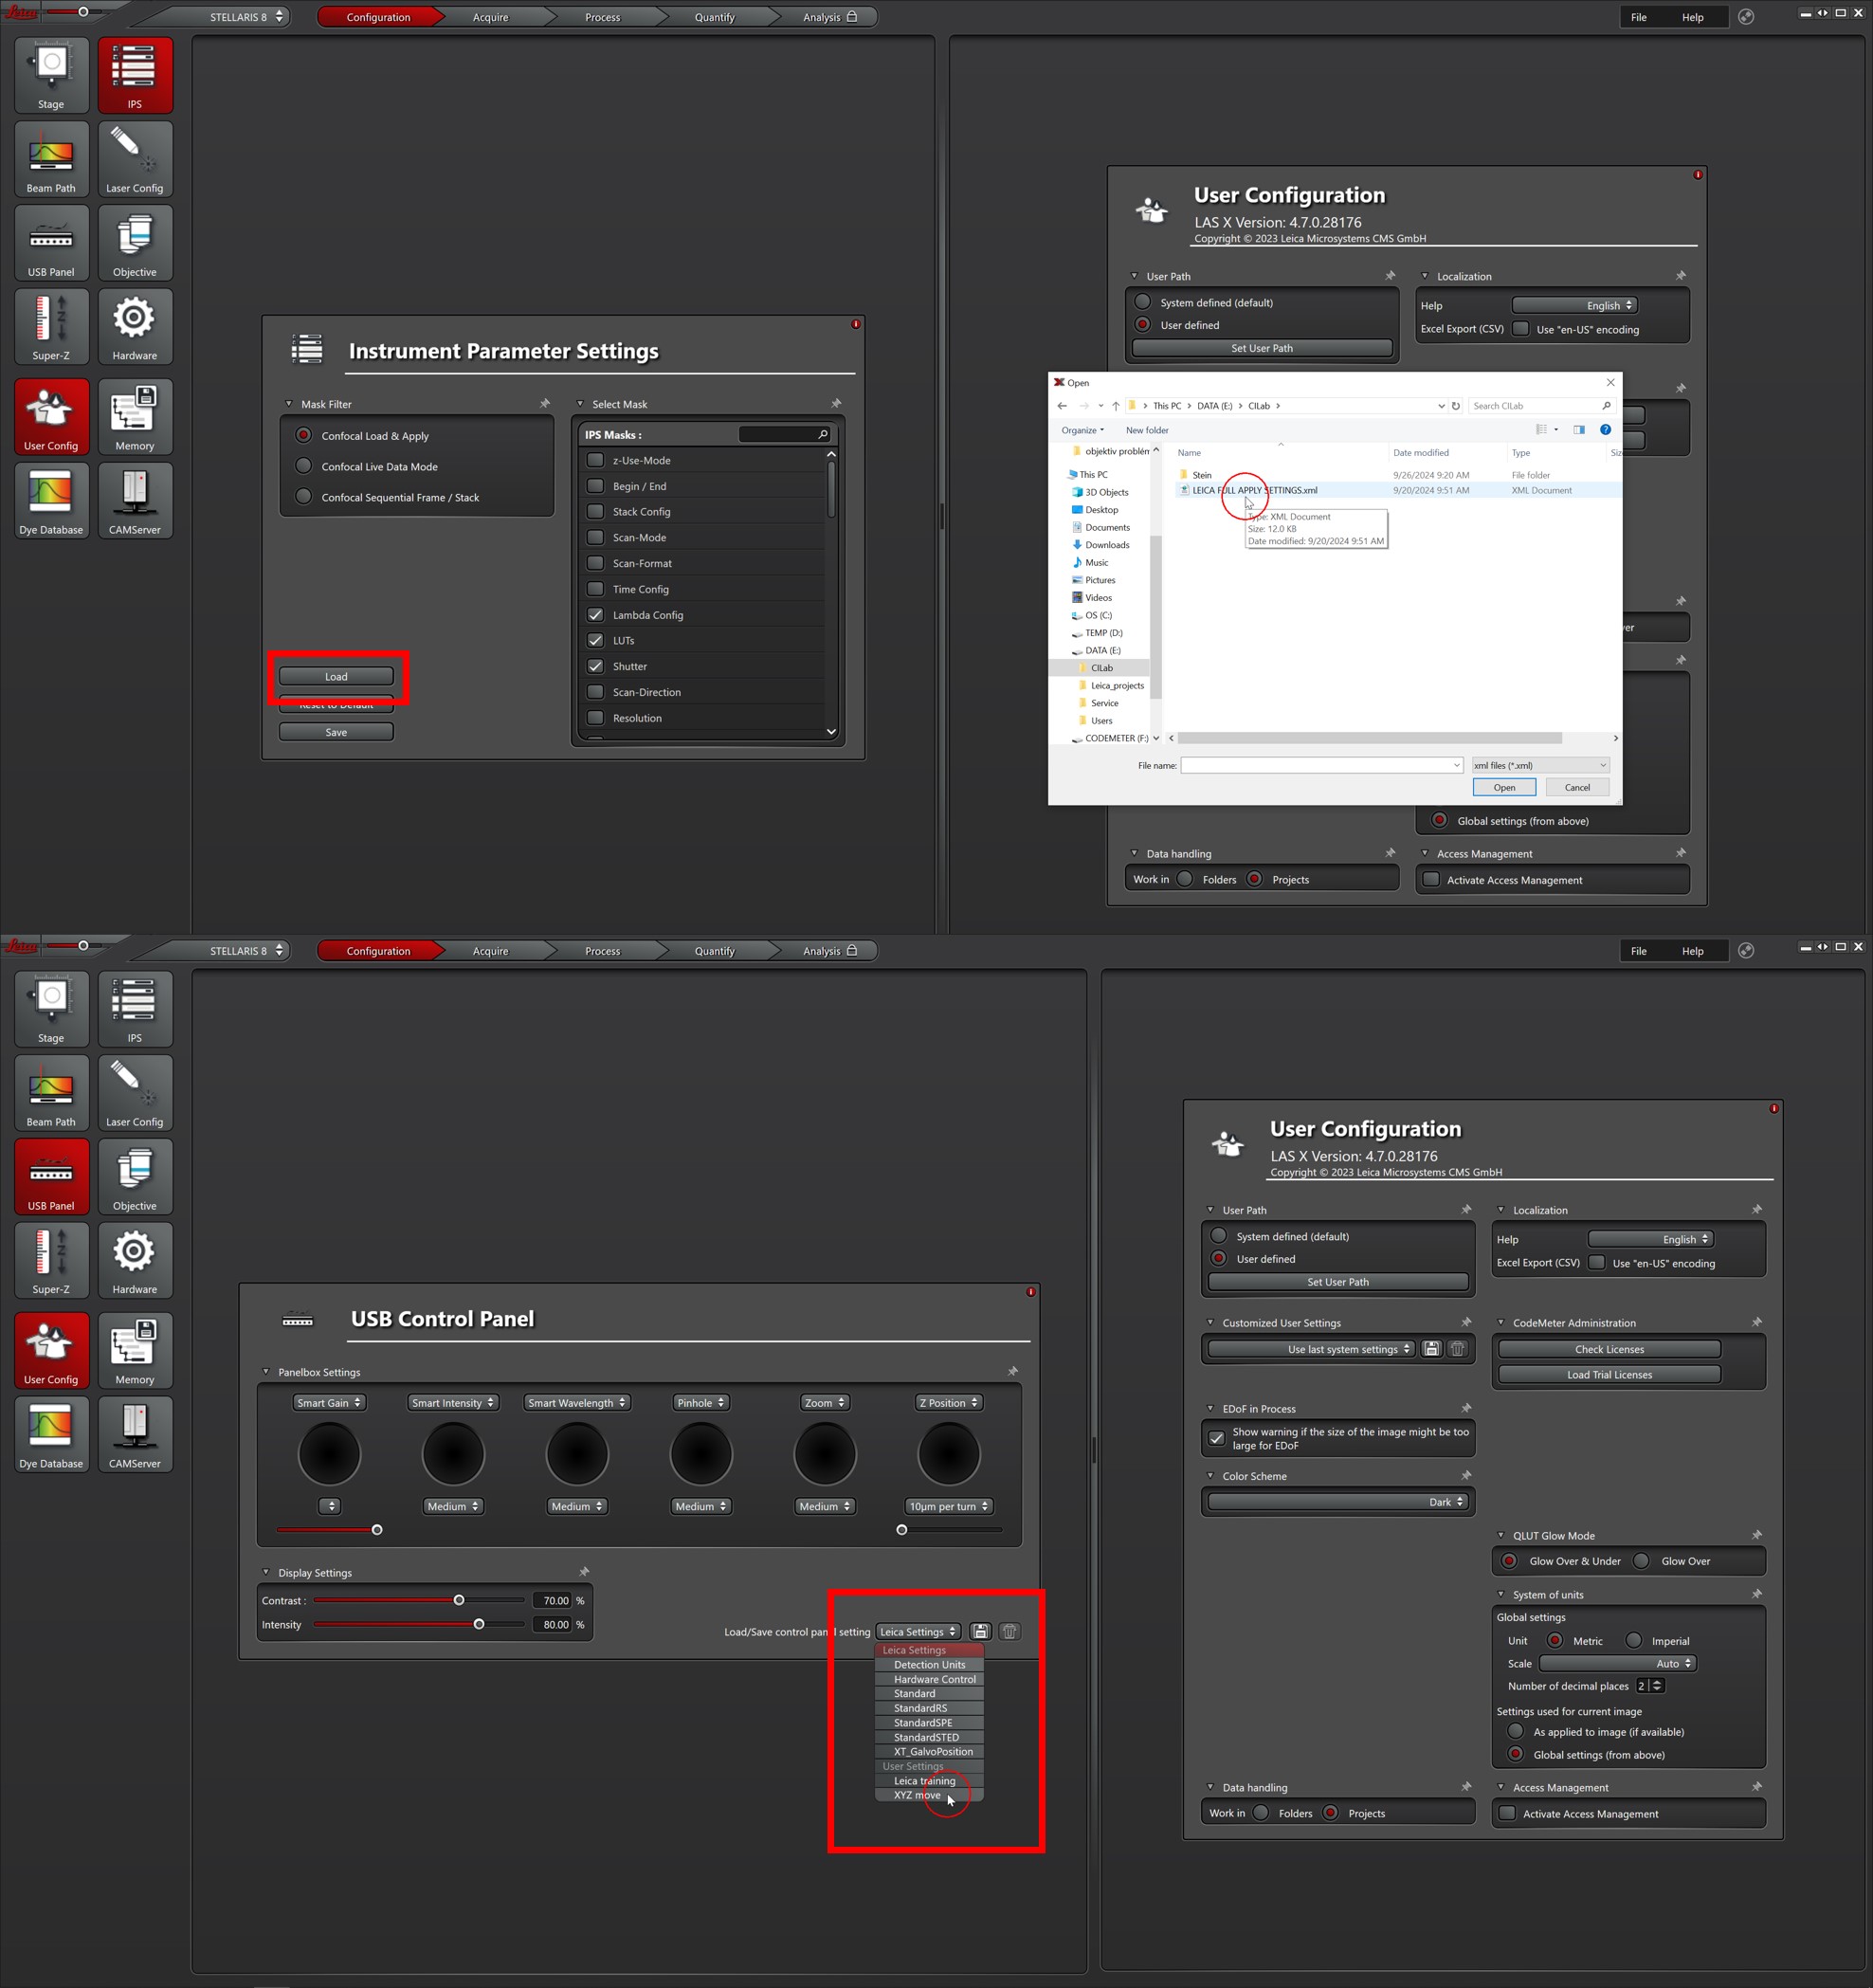
USB panel - Leica Settings - XYZ move
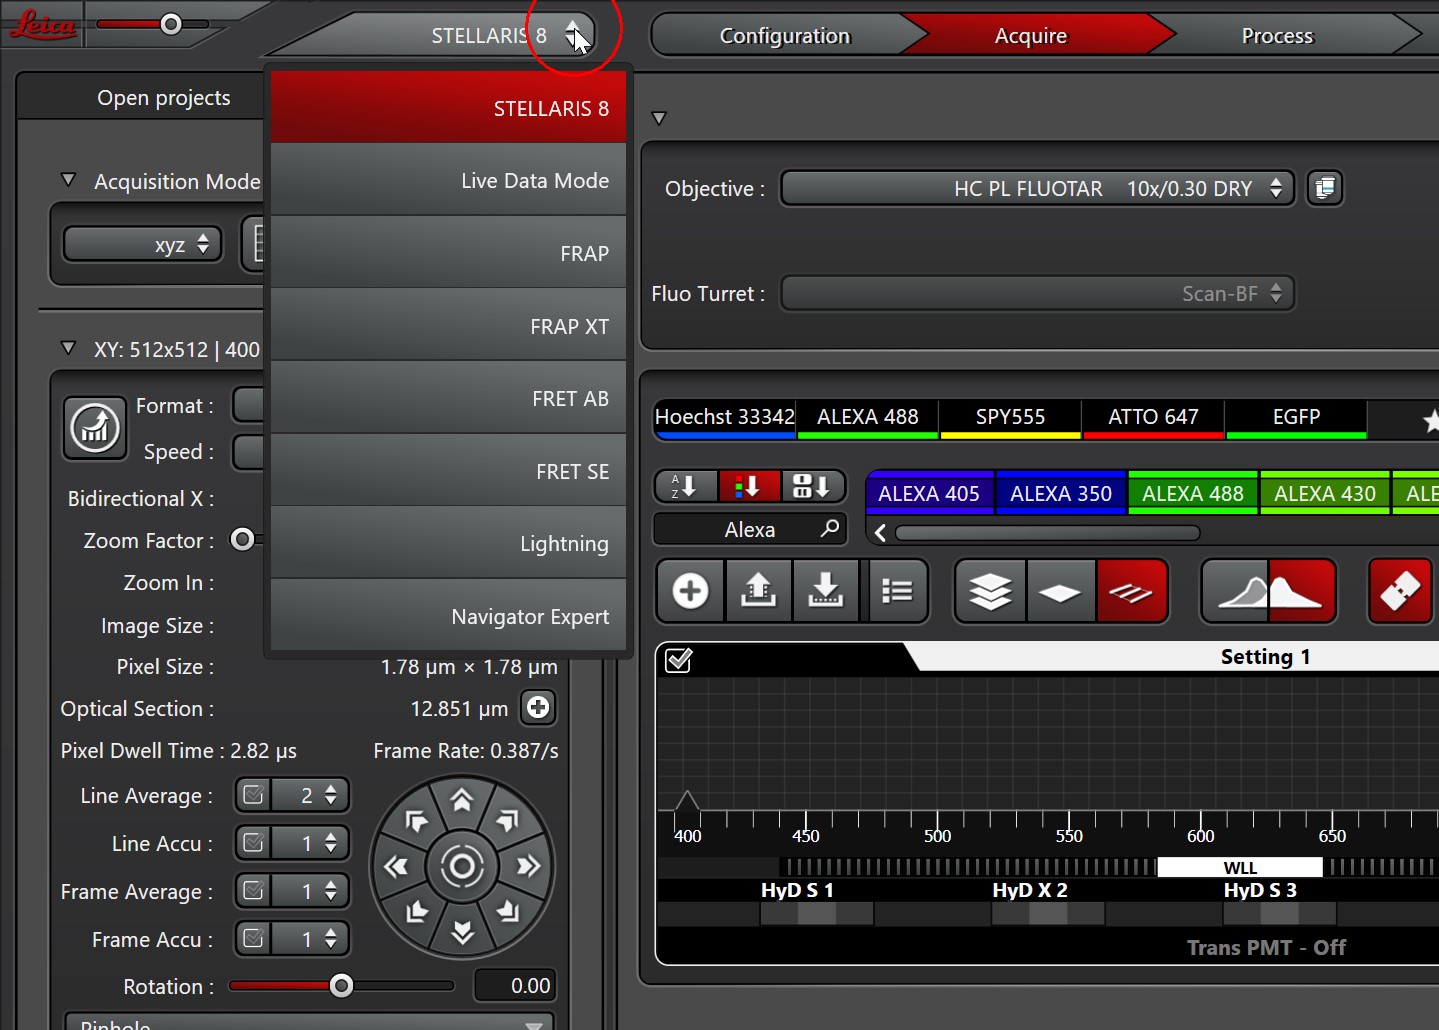
Acquire
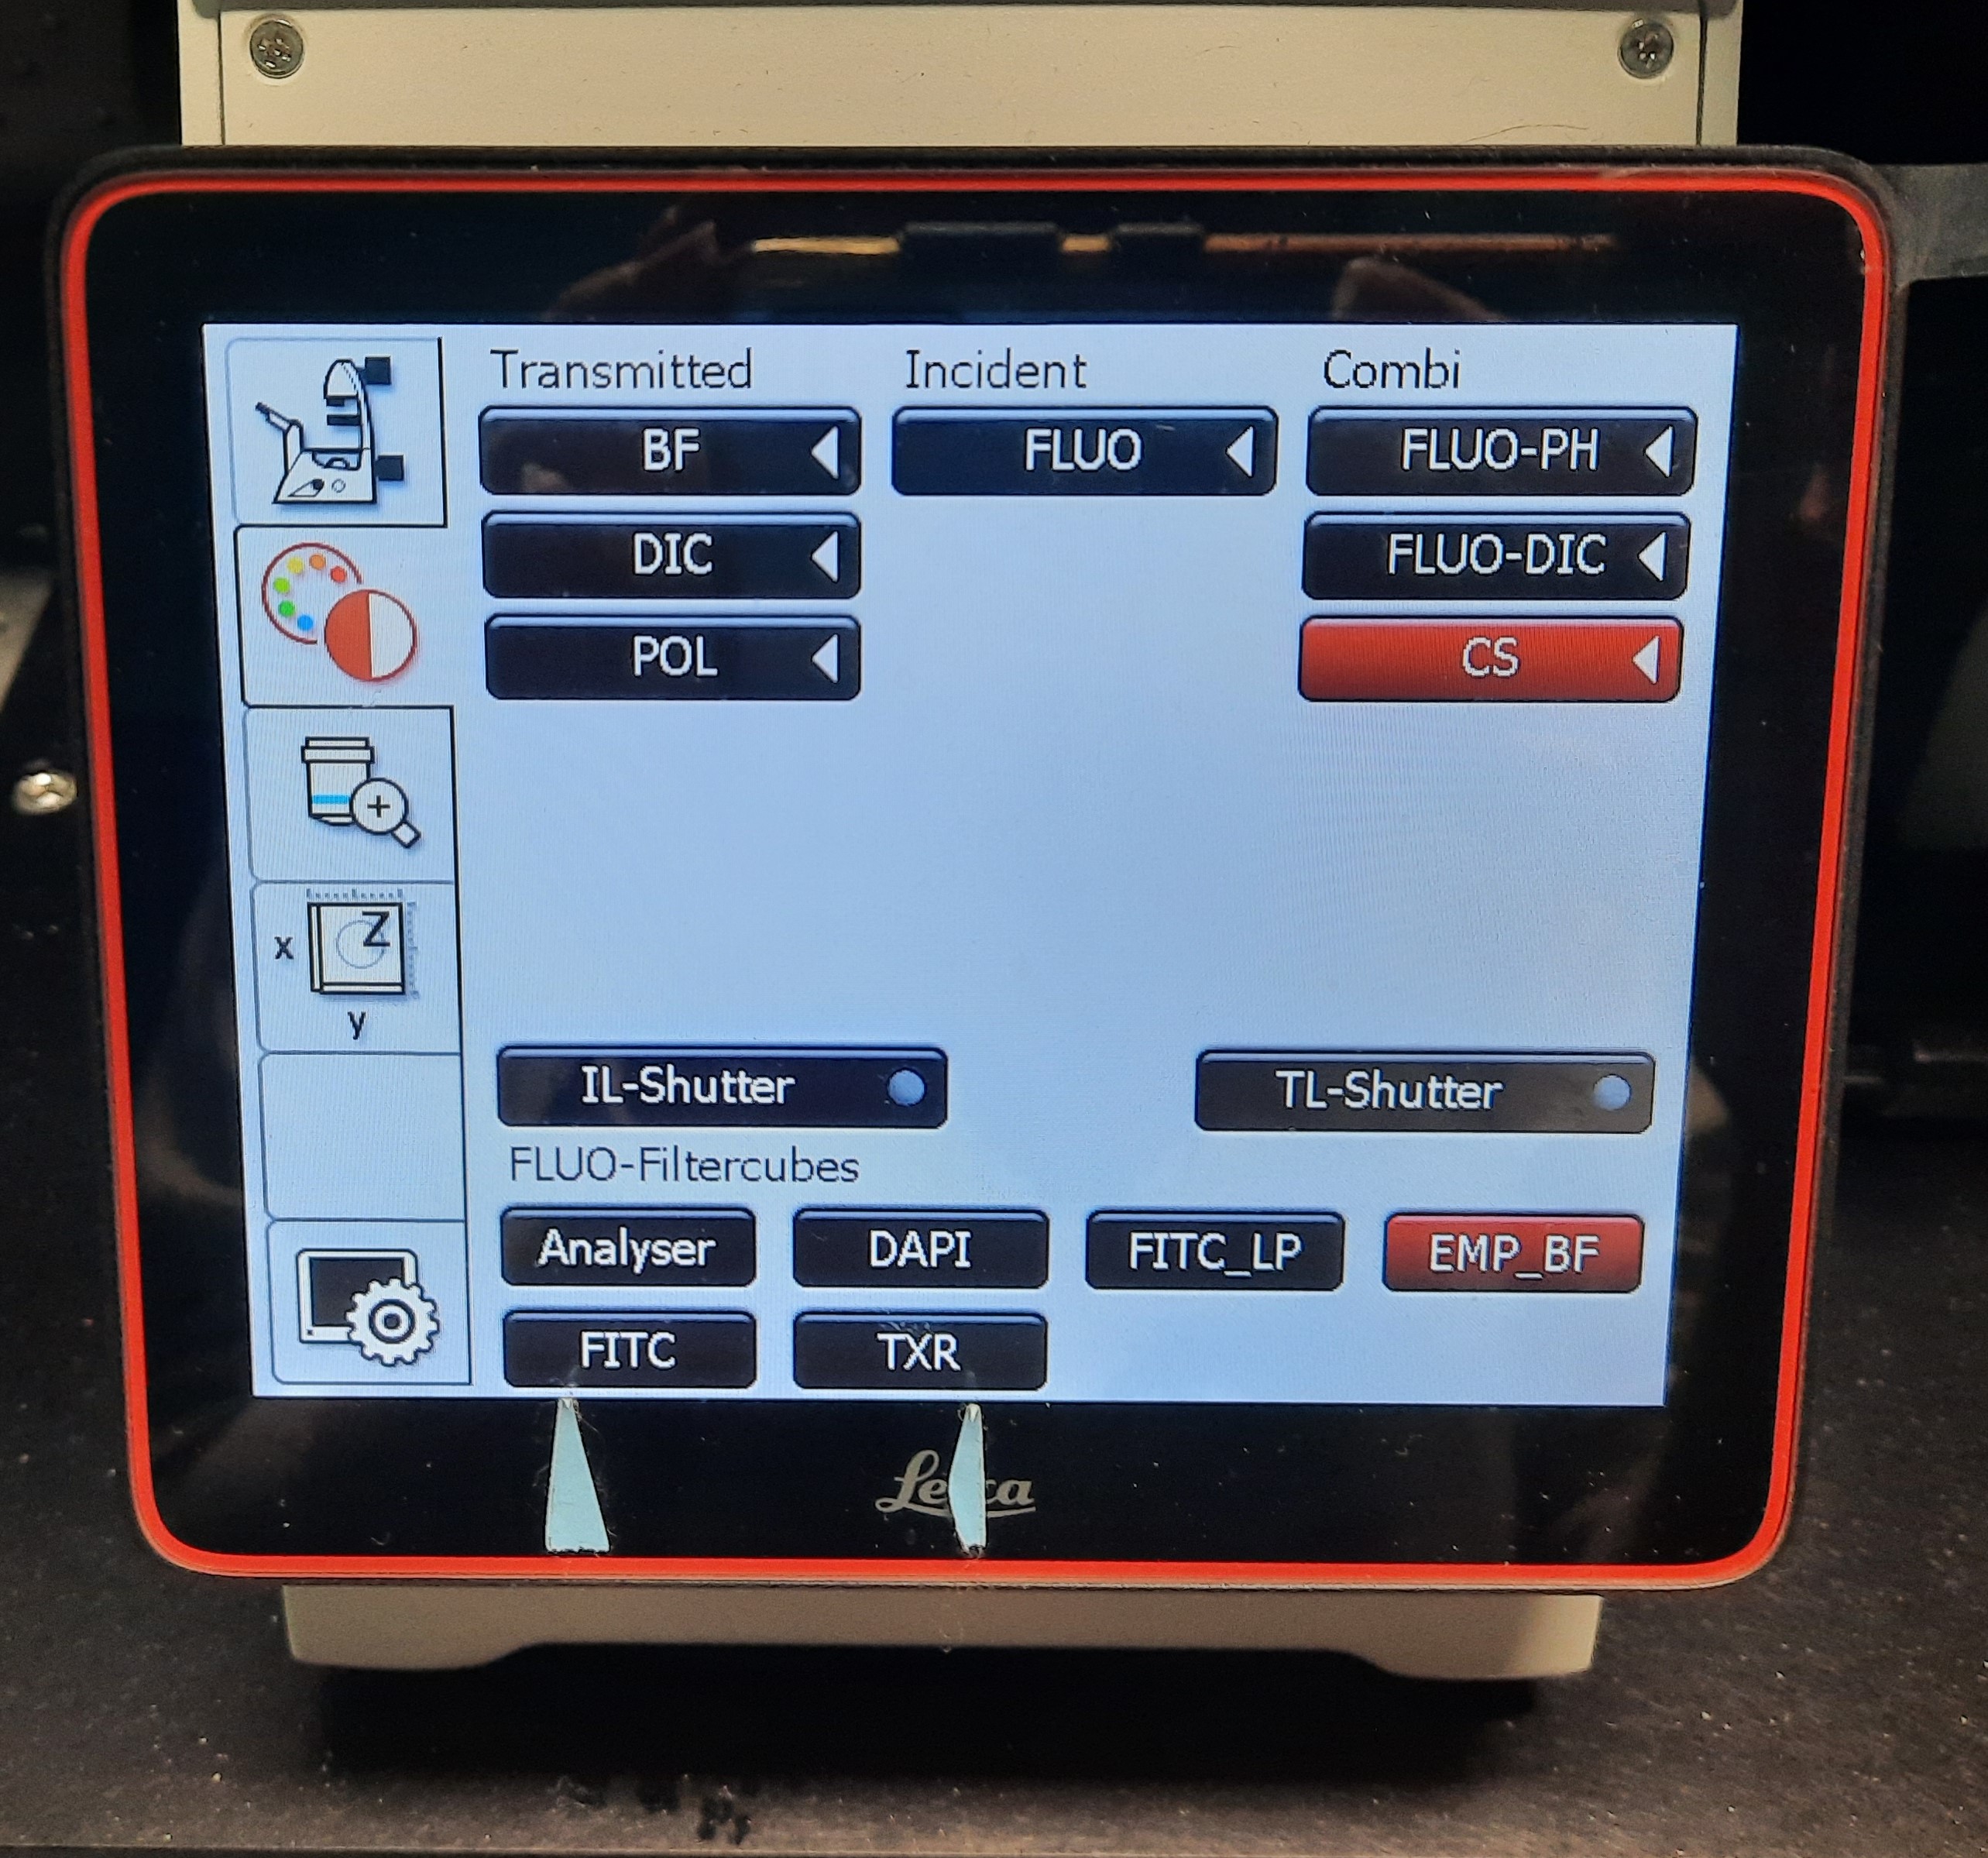
It is recommended to first locate the sample and adjust the focus using BF or Fluorescence.
You can select BF or Fluorescence mode on the touchpad.
 Then, in the LAS-X software, using the selected lasers (see below) and either Live or Fast Live mode. Adjust the focus in the selected area.
You can select BF or Fluorescence mode on the touchpad.
Then, in the LAS-X software, using the selected lasers (see below) and either Live or Fast Live mode. Adjust the focus in the selected area.
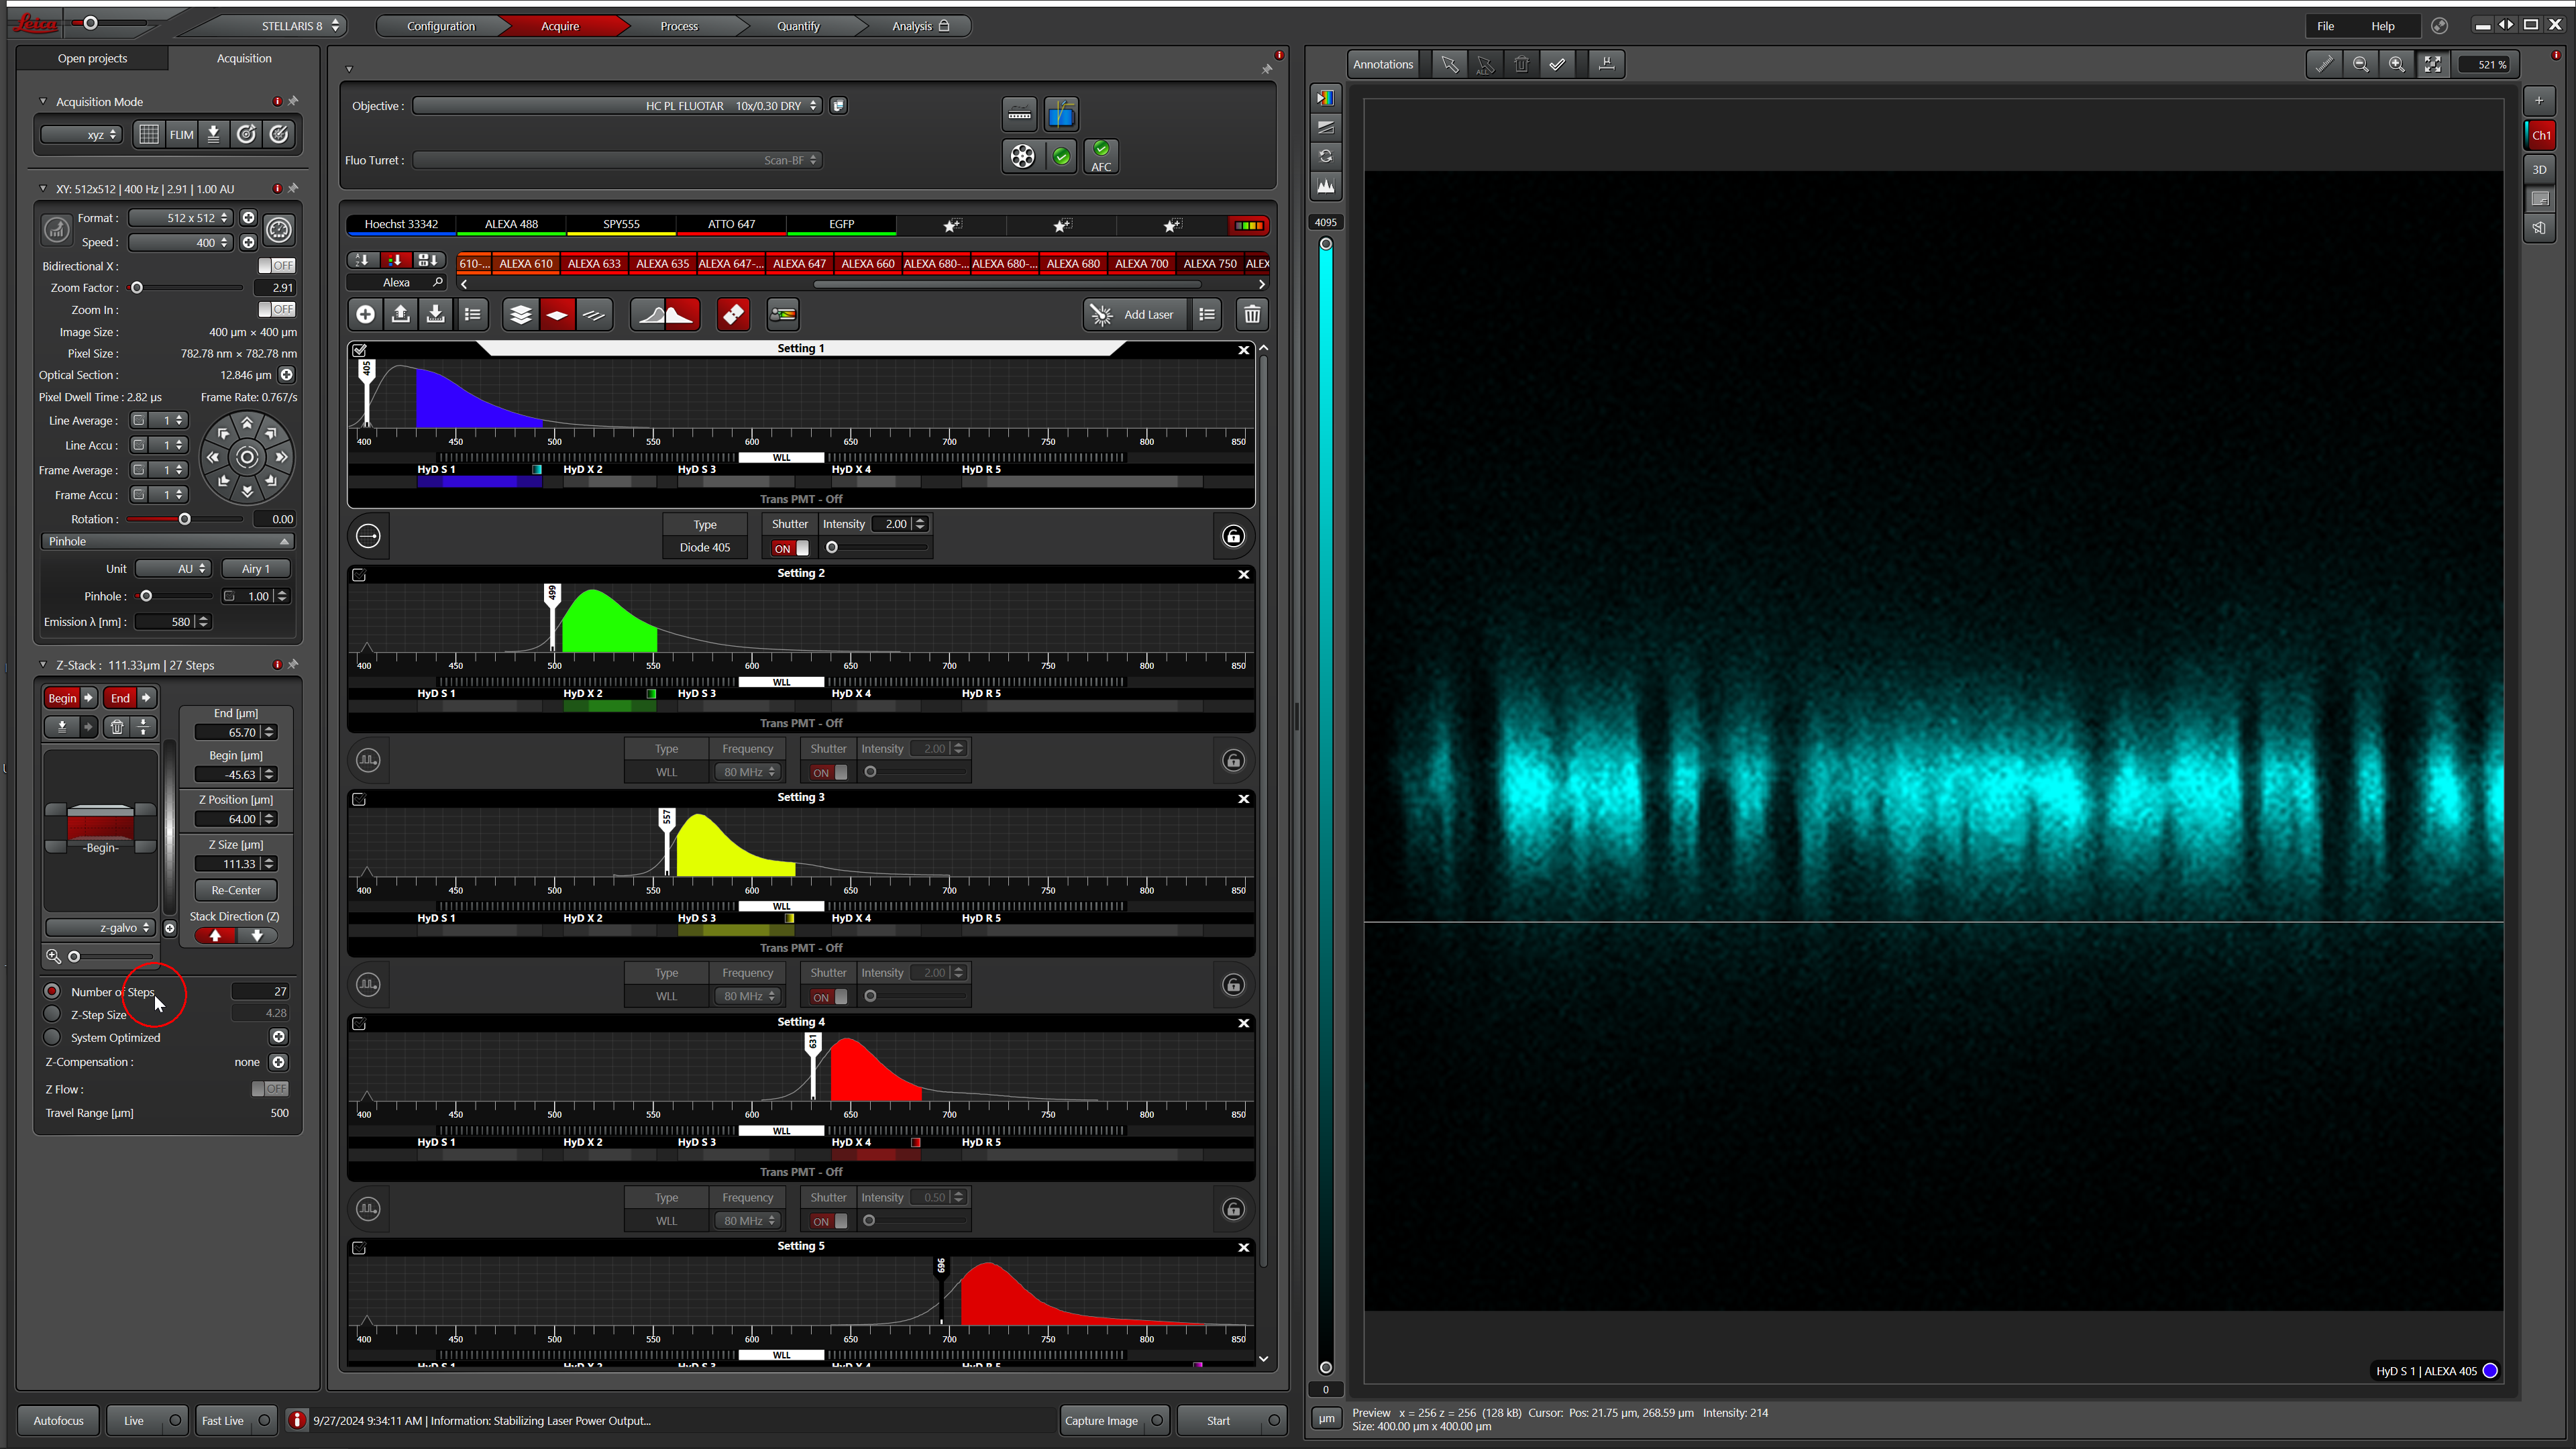
Diode 405 nm; WLL 440-790 nm
Drag and drop the lasers (Add laser button) and the dyes from the list

Optional detector selection: 5 big button
<550 nm S - ex. DAPI, GFP, ALexa 488
550-750 nm X
>750 nm R
(>825 nm only S)
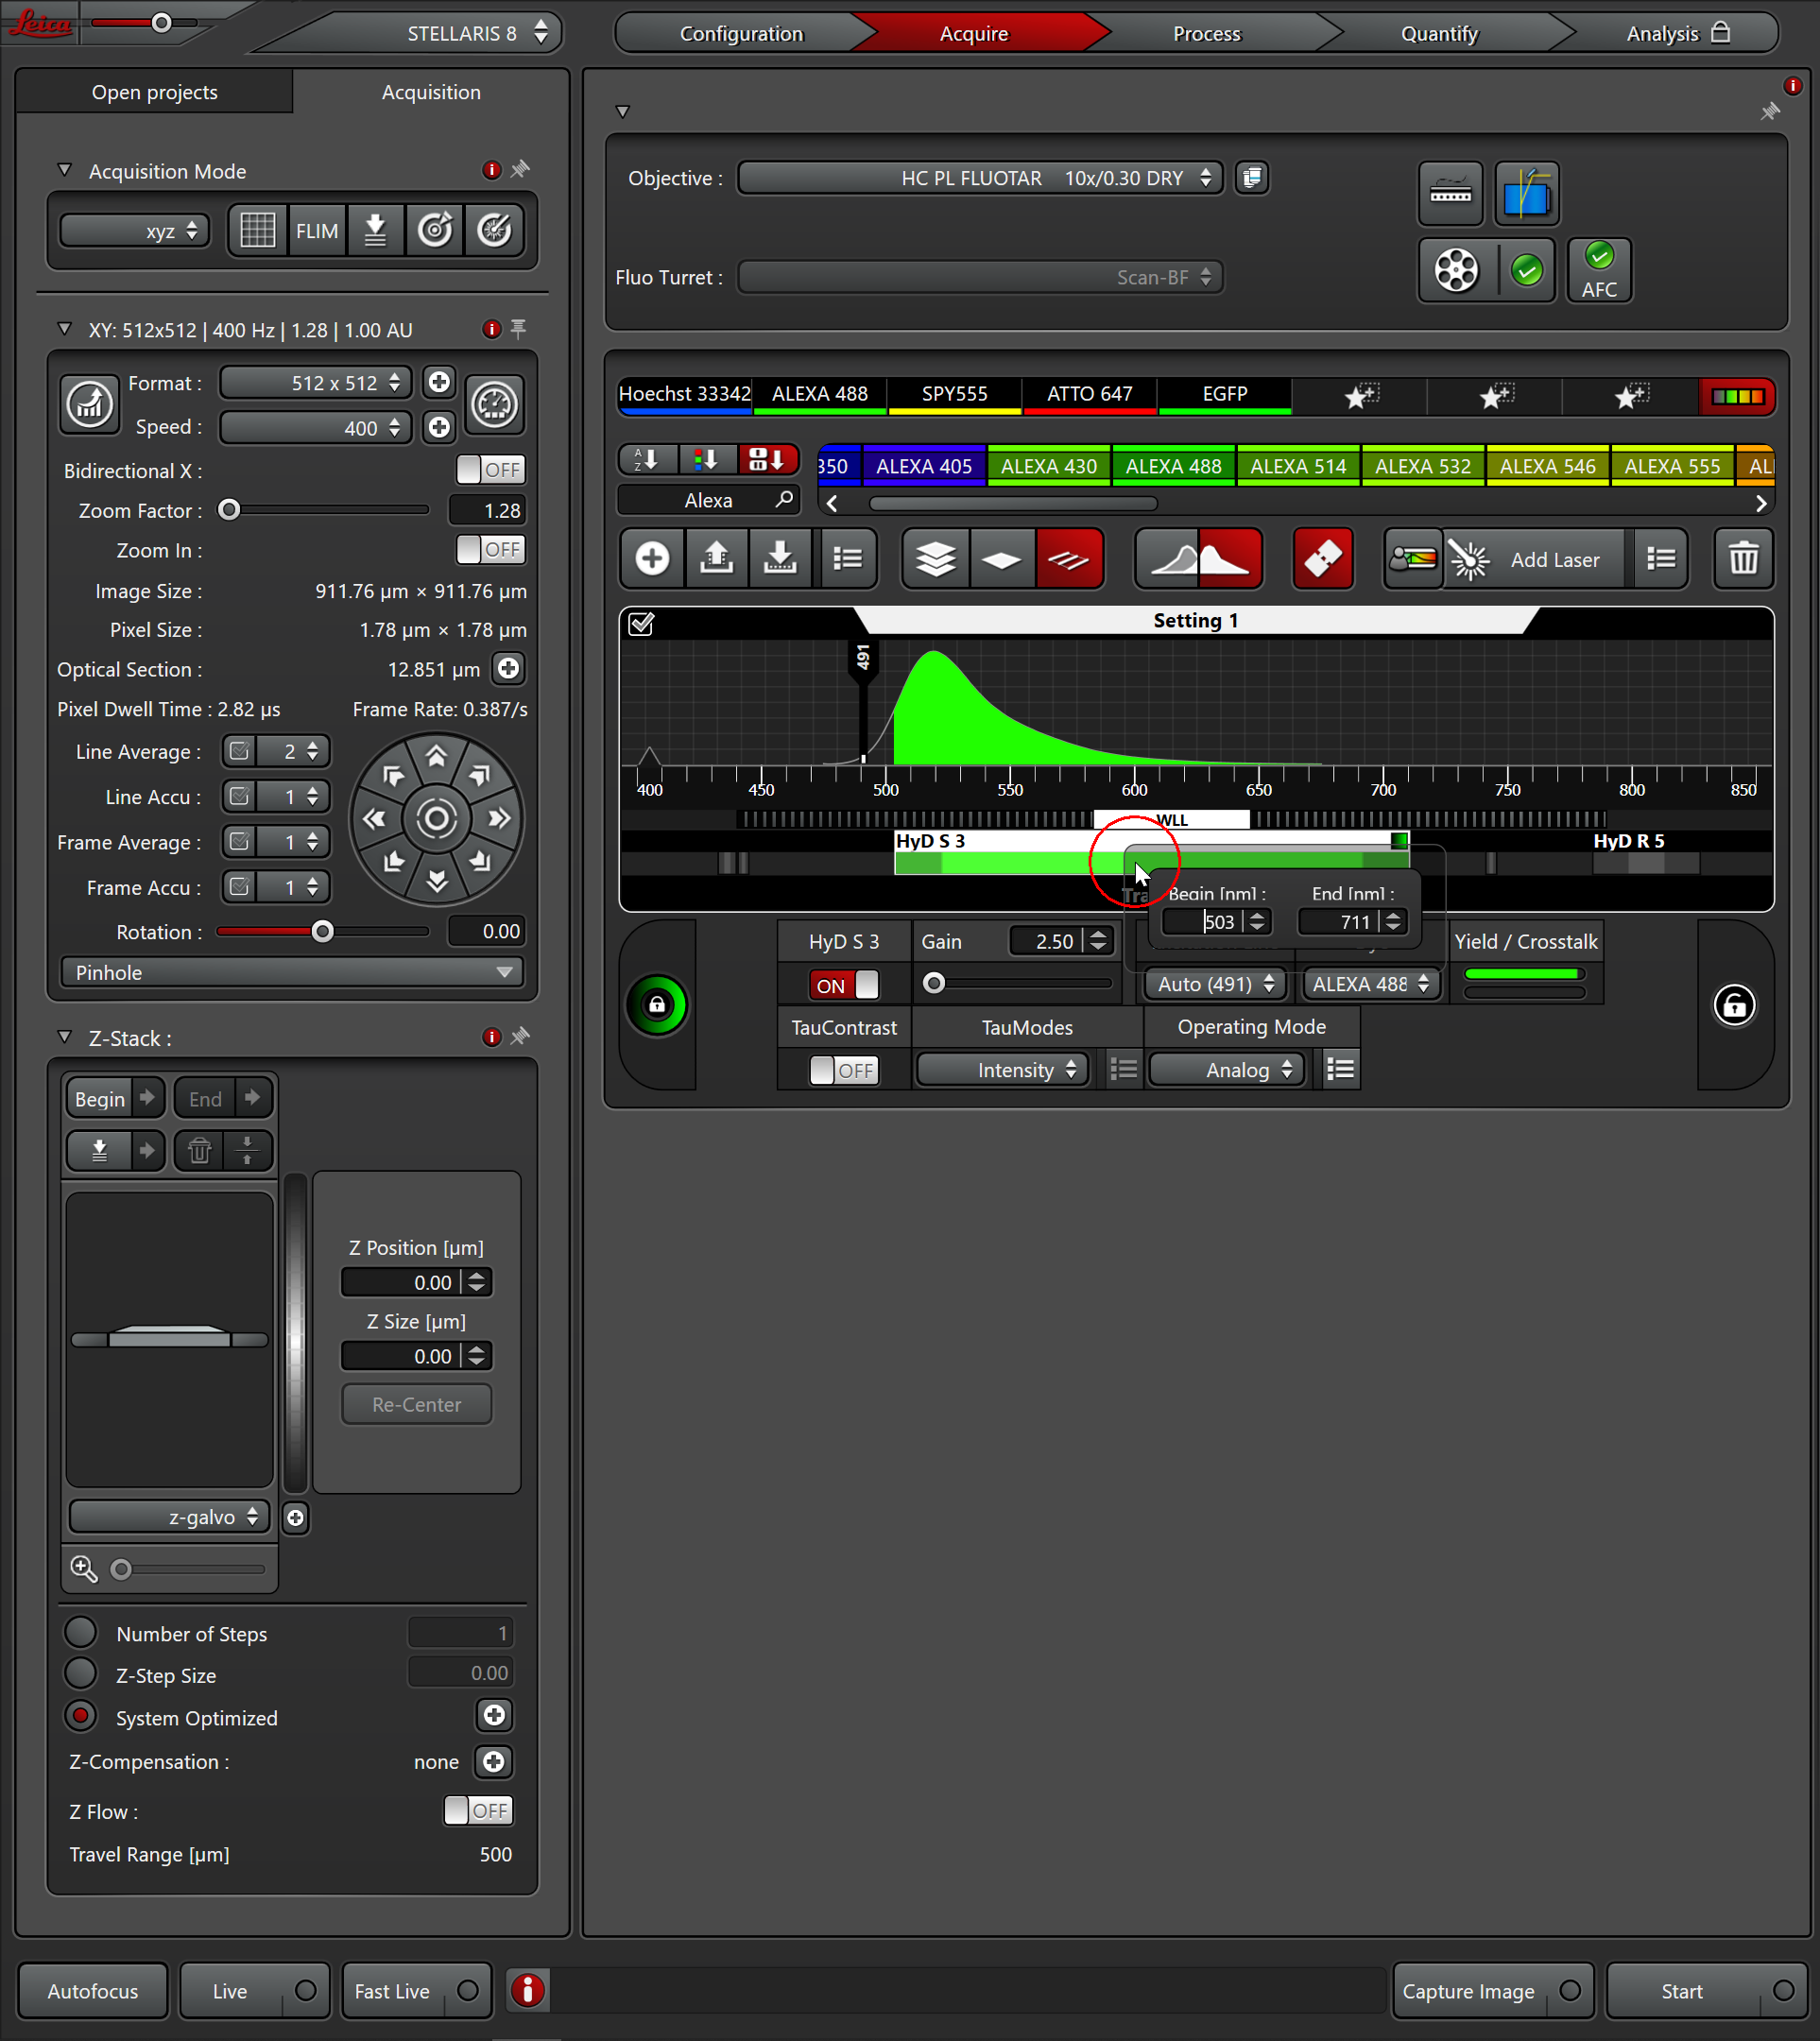
Usual laser power: 0.5-2% - At the beginning lower it to 0.5%!
If the detector is overloaded, screaming, stop it immediately!
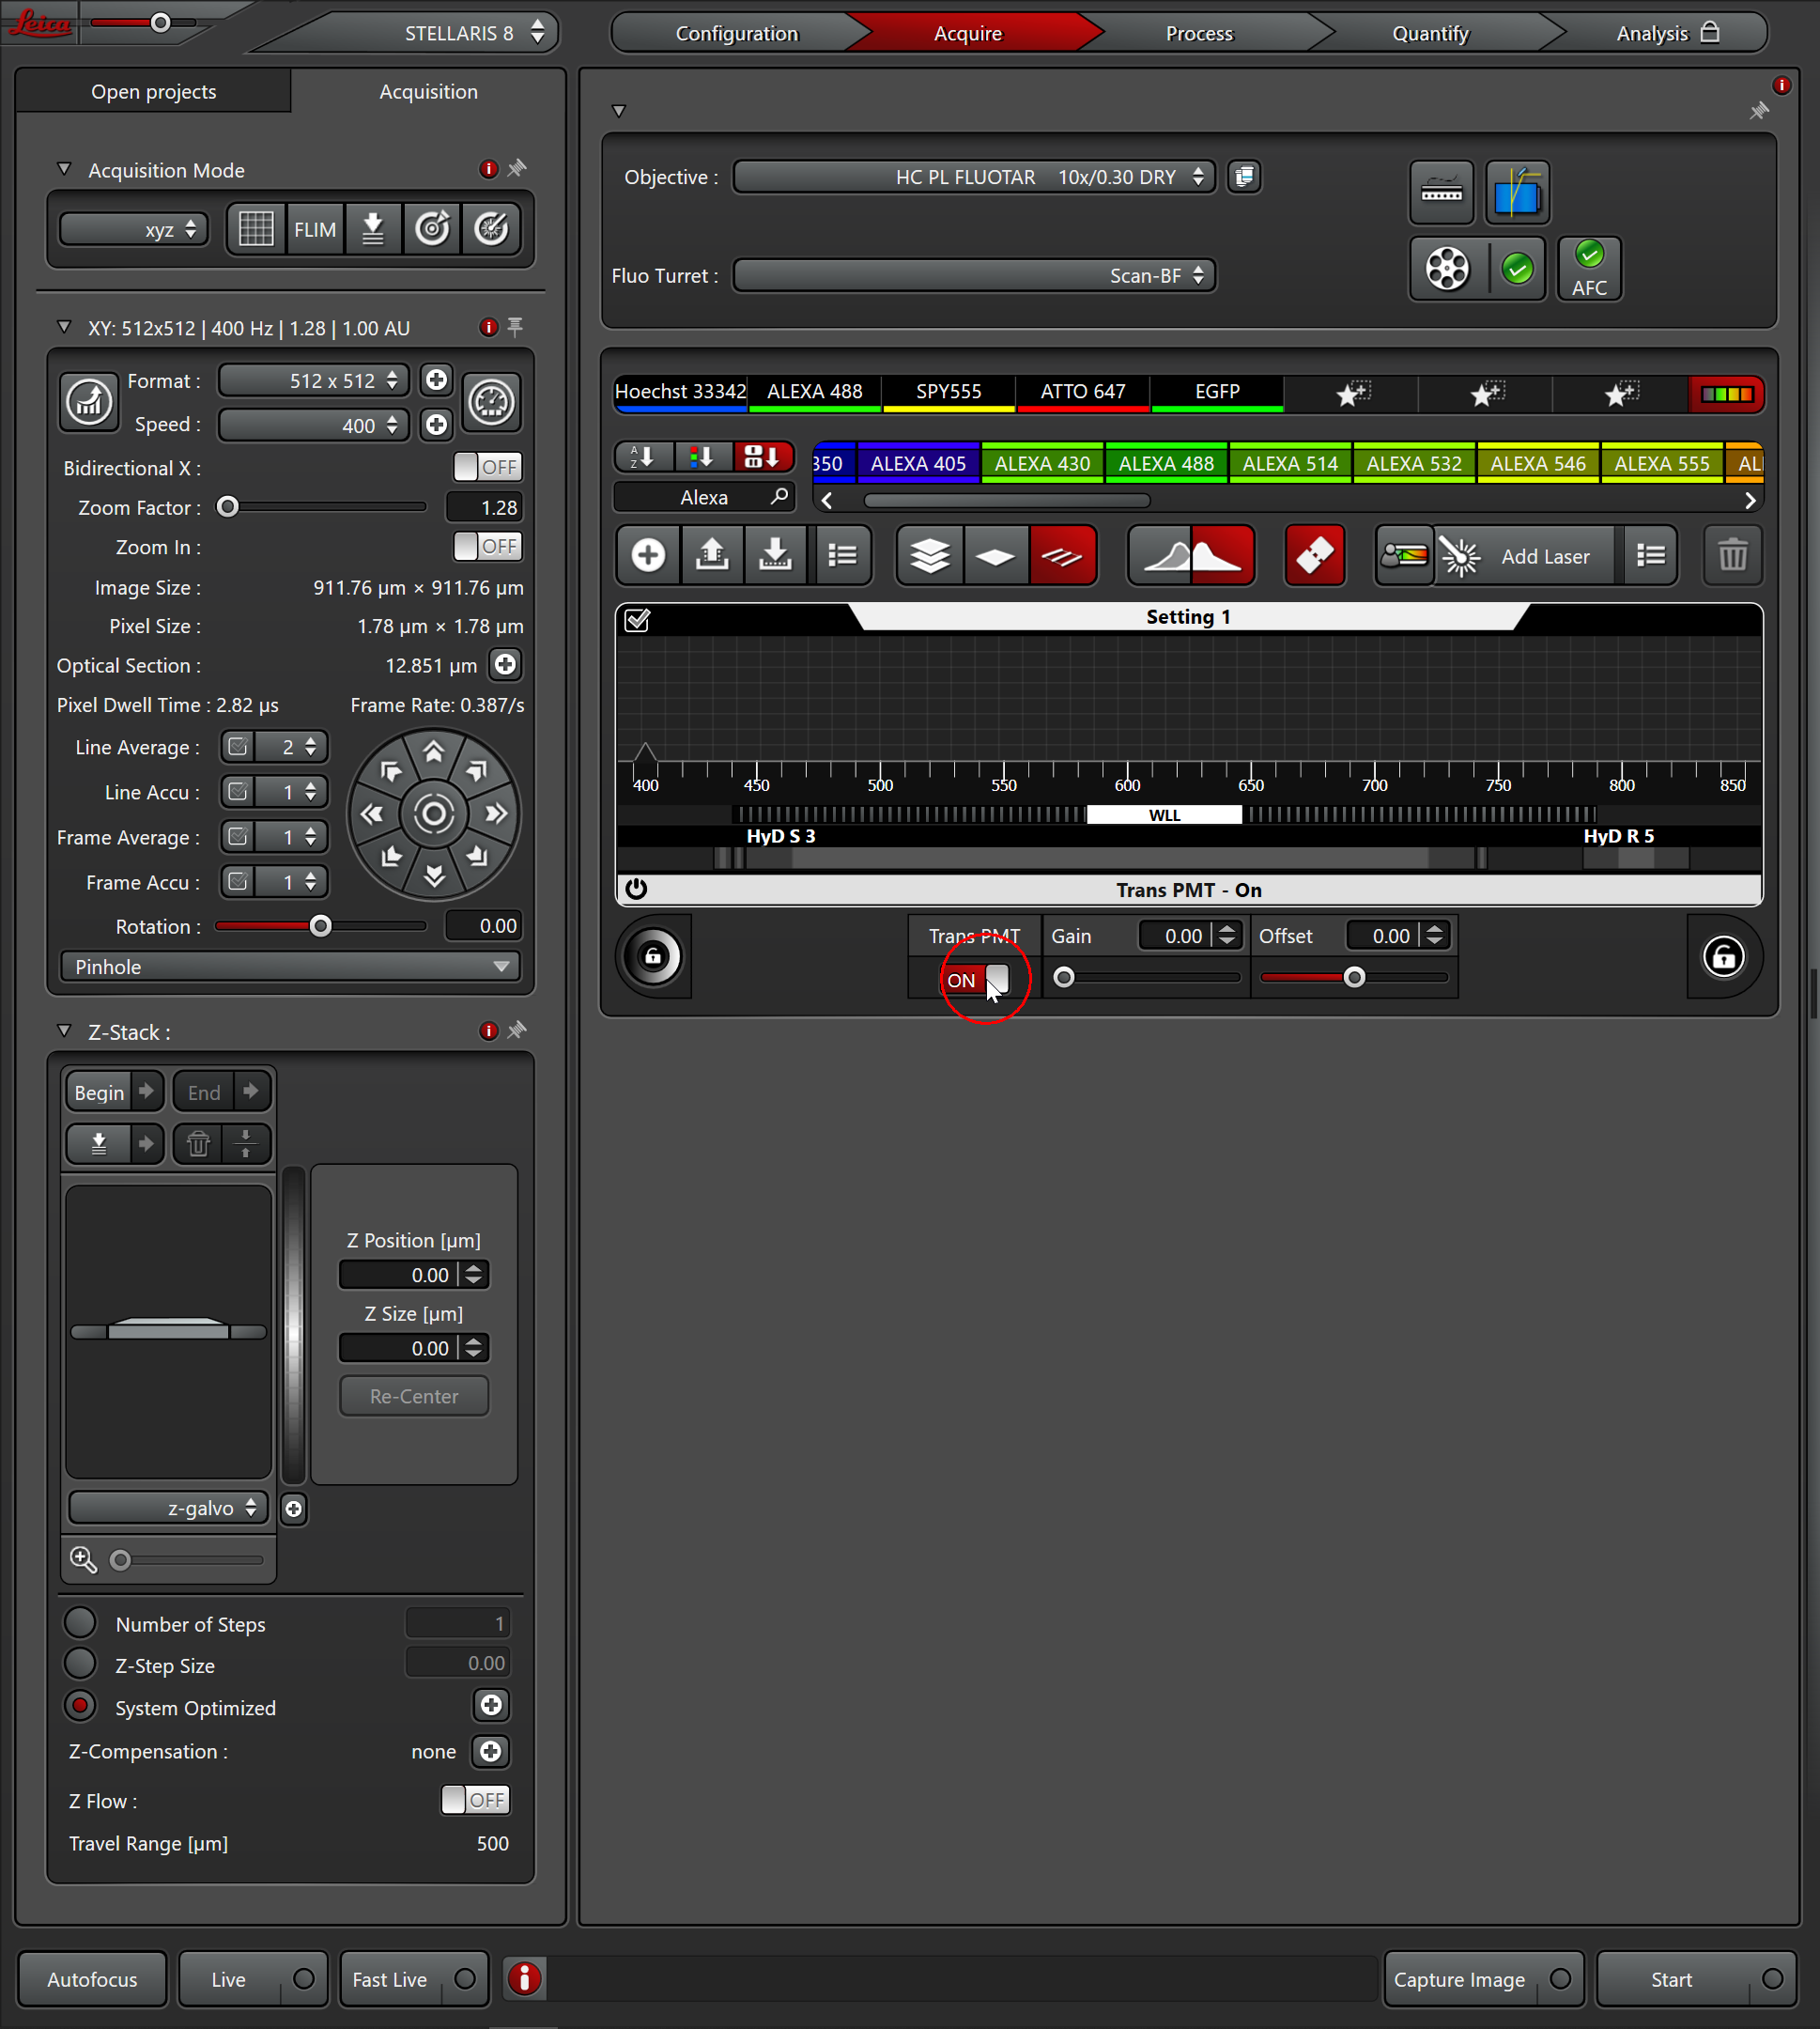
Transmission - raise the gain (black controller)
S, X, R detectors are used at the minimum gain.
Drag and drop the lasers (Add laser button) and the dyes from the list
Optional detector selection: 5 big button
<550 nm S - ex. DAPI, GFP, ALexa 488
550-750 nm X
>750 nm R
(>825 nm only S)
Usual laser power: 0.5-2% - At the beginning lower it to 0.5%!
If the detector is overloaded, screaming, stop it immediately!
Transmission - raise the gain (black controller)
S, X, R detectors are used at the minimum gain.
Modes
- Galvo mode must be selected.
- switch Acquisition mode to xzy, run fast live.
- switch back to xyz. Now you can chose the top and the buttom limits.
- Doublecheck the zoom factor (probably it is higher than you need).
- Do not touch Z wide! (It ruins the saved Z coordinate.)
LasX Navigator - The third icon on the left side (be patient)
Capture: just a photo
Spiral: create a map
Mark button (P1 area on the Task list)
If you want, to save the map: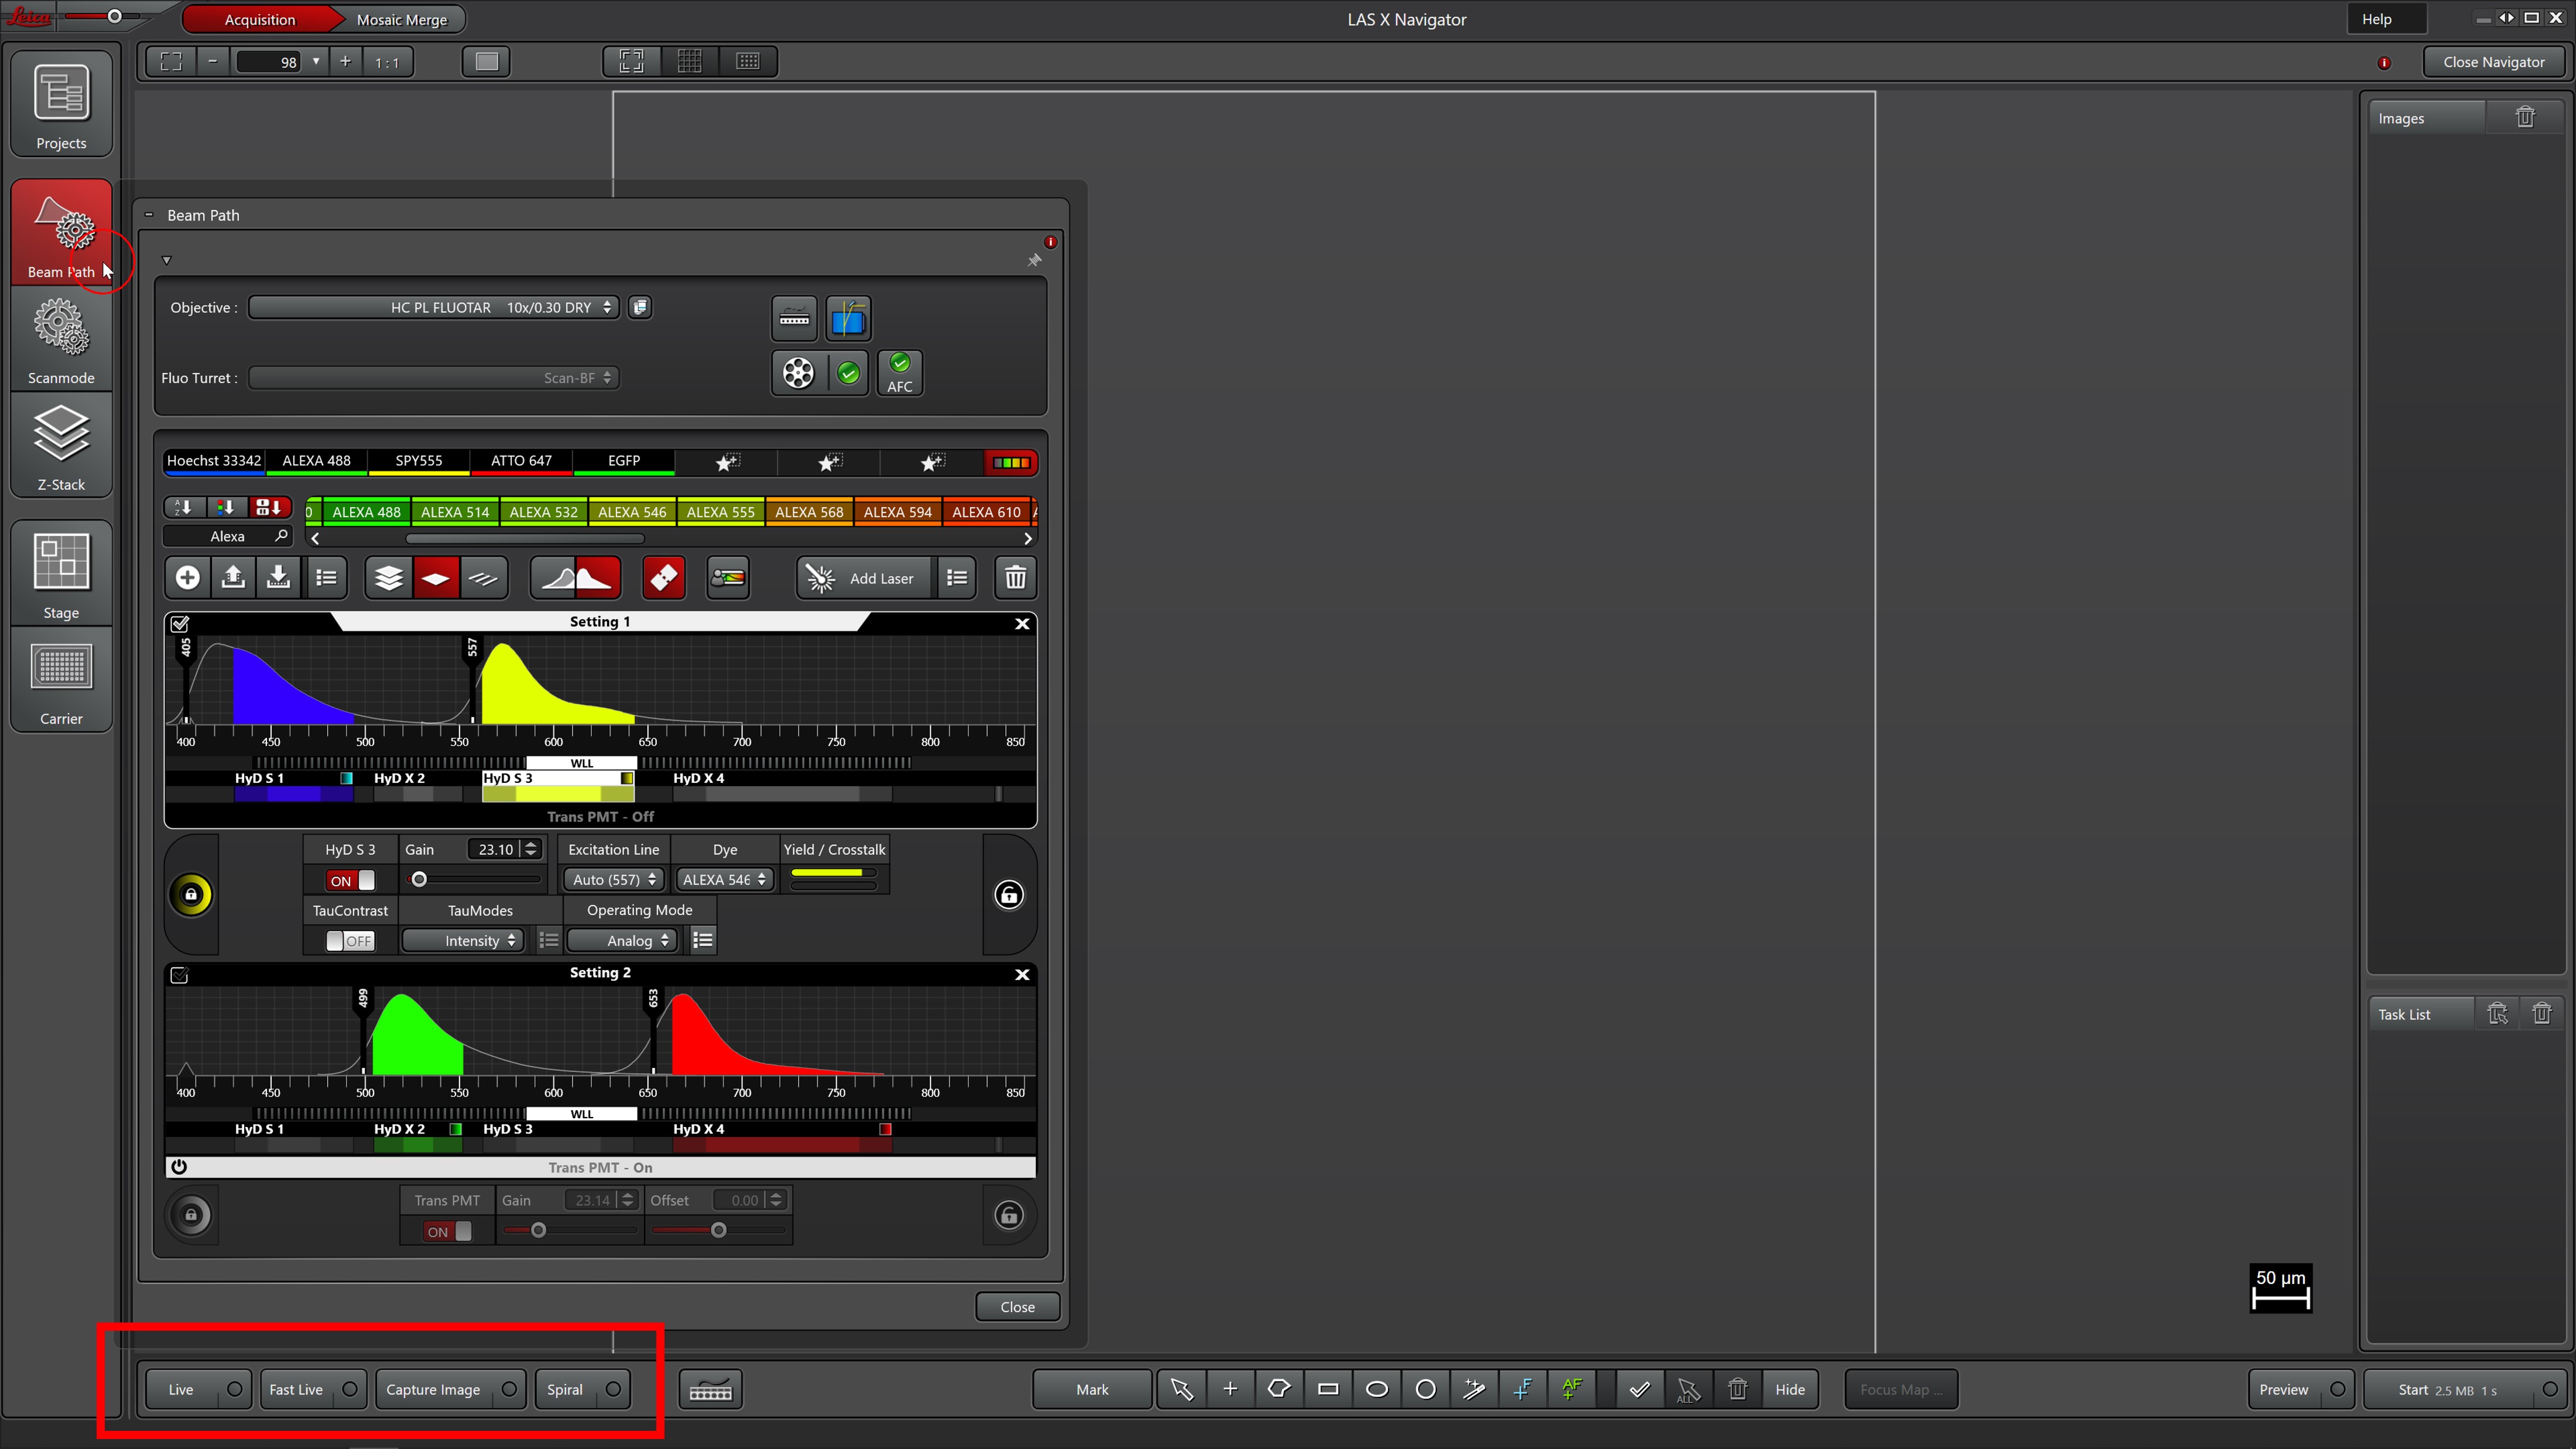
Capture: just a photo
Spiral: create a map
Mark button (P1 area on the Task list)
If you want, to save the map:
- Save Overview (only the important preview should be selected)
- Close Navigator
- Process - Mosaic Merge
- In Project, select the appropiate Overview - Apply
- The new file can be saved
- Export Image; Export LUT; Export Channels (Scaled Viewer Image (SV))
- For multi-channel images Export Overlay as scale Viewer Image
It is used to visualize the lifetime to the fluorescence. Very useful for distinguish overlapping dyes (e.g. Alexa 488 and GFP).
You need to turn on TauContrast, to see the different lifetimes.
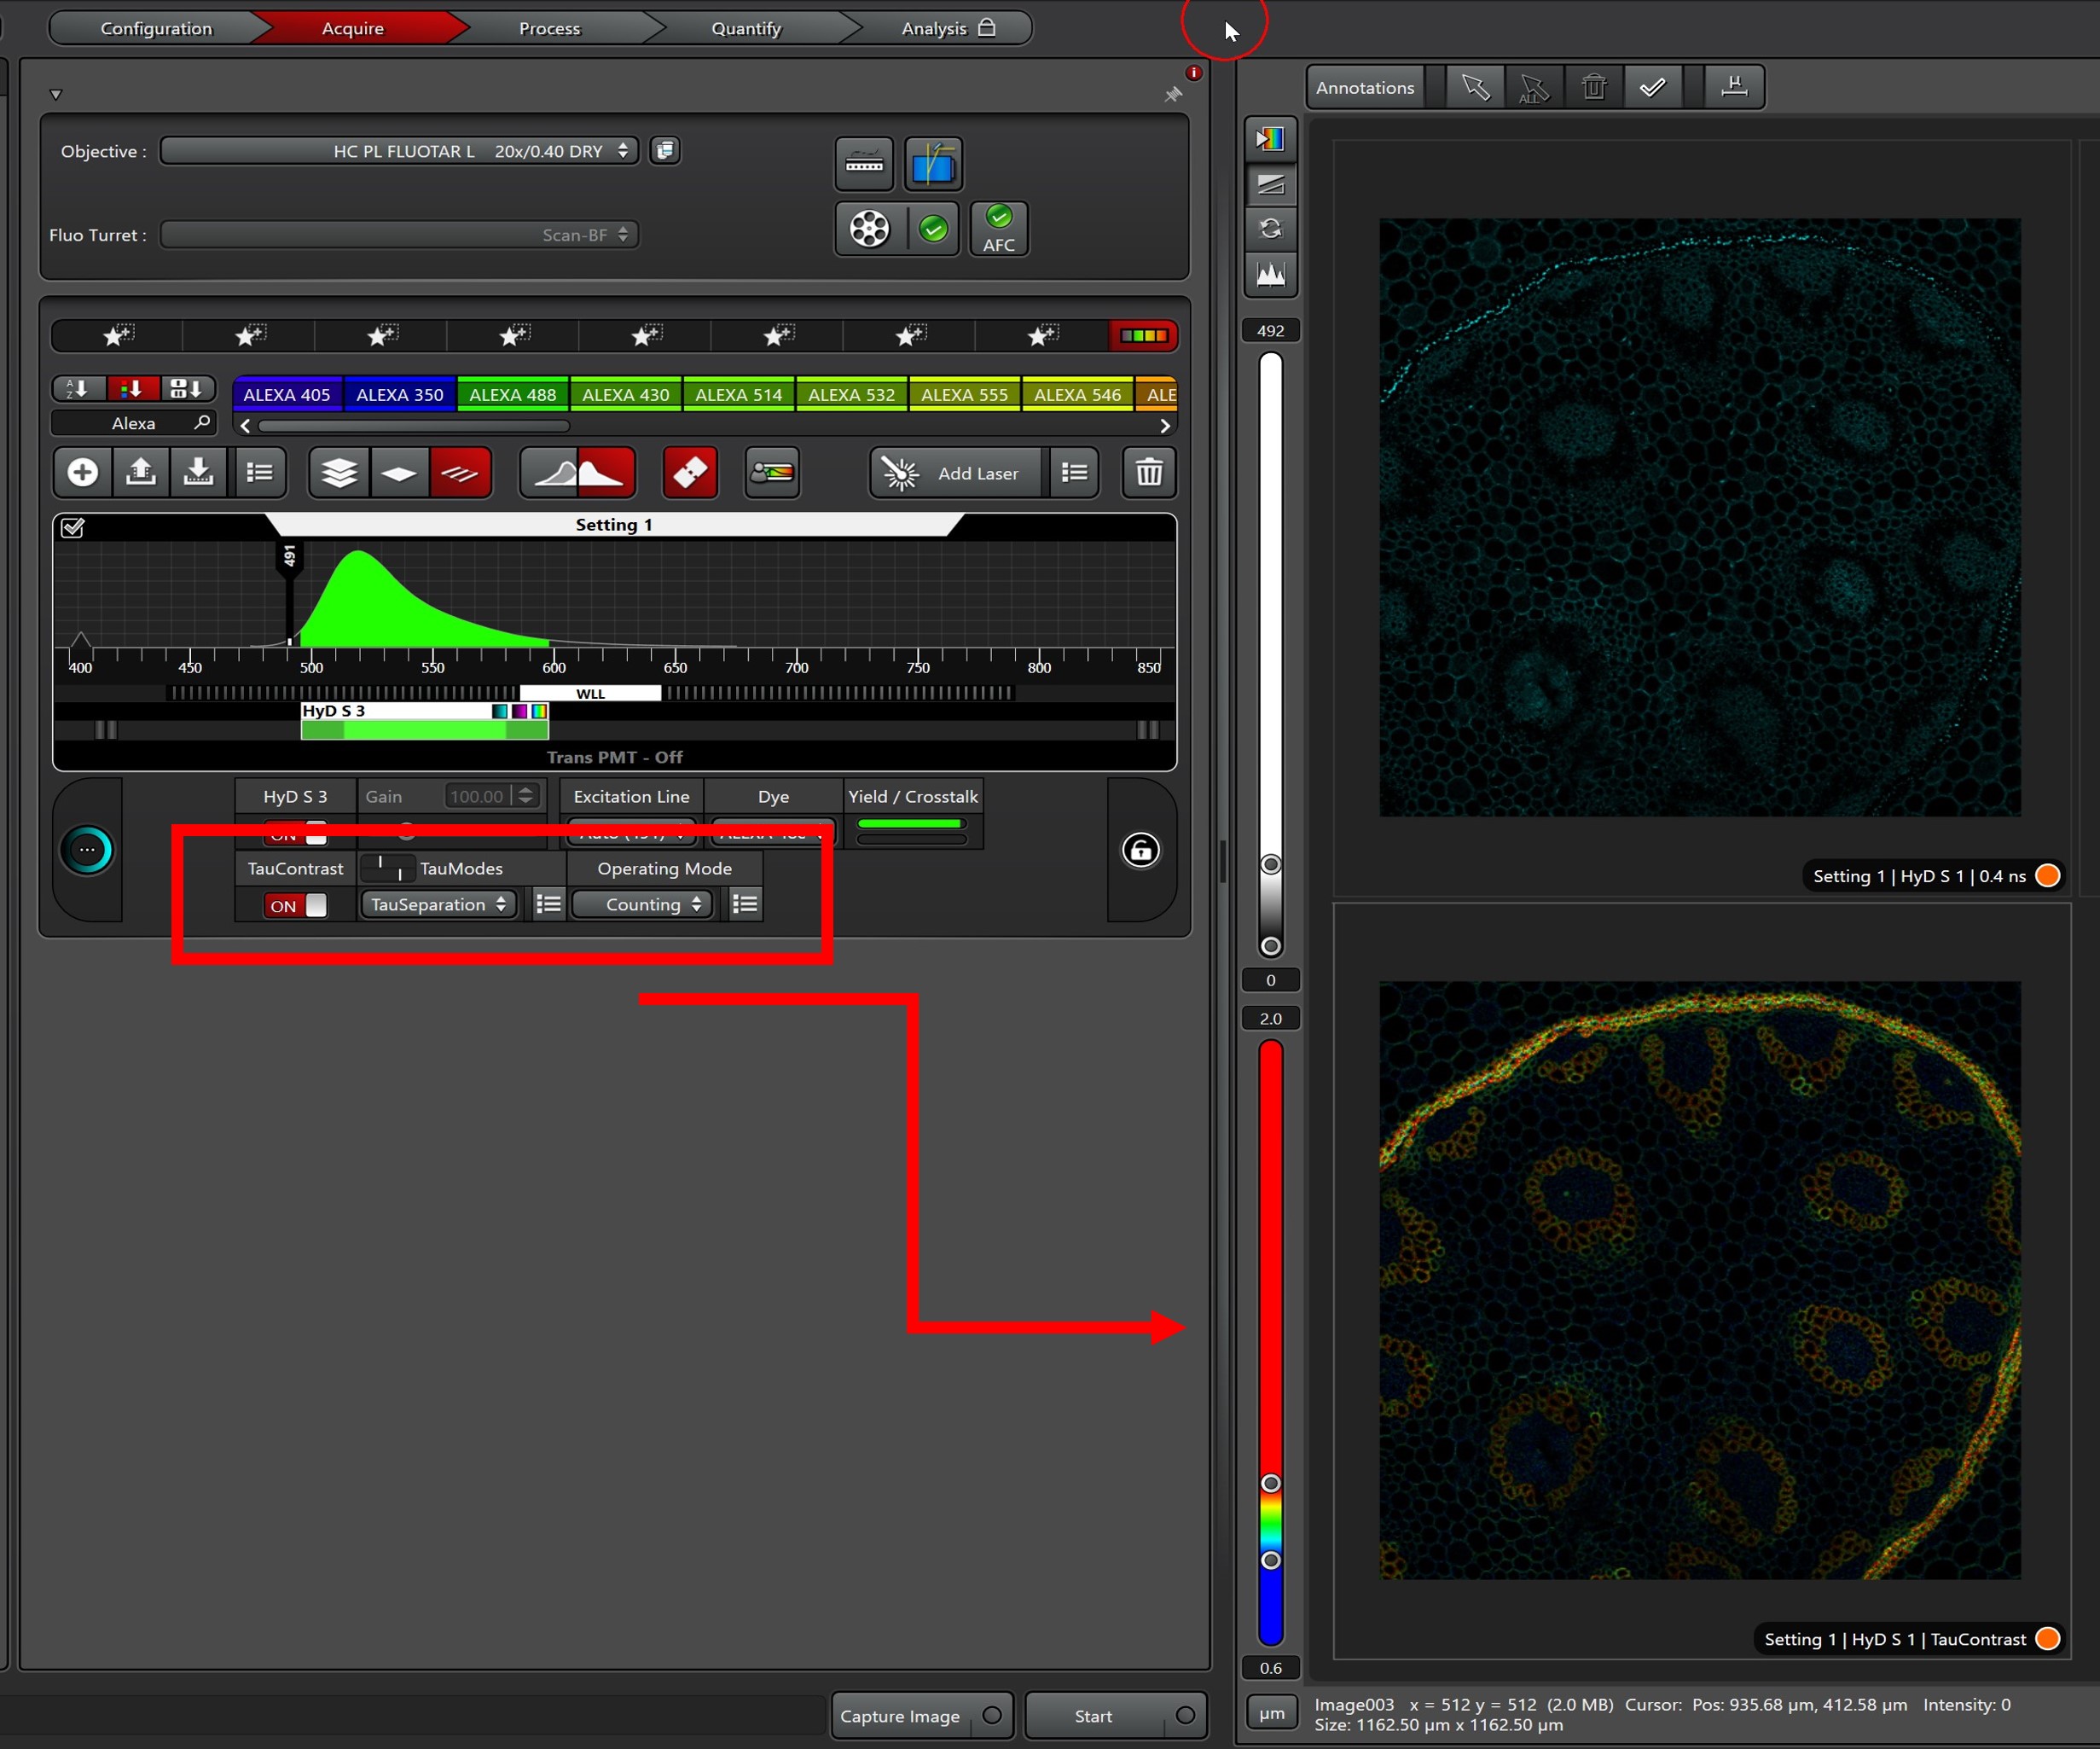
You need to turn on TauContrast, to see the different lifetimes.
Leaving/Switch off - check the reservation
- Save your work/project - if you need, export the images to TIFF format (but FIJI can open LIF files) - to your network drive
- Clean the objective (if you've used oil) and select the 10x and bring it down
- Turn off the lasers (Configuration)
- Exit LAS-X software
- Logout from ASOK
- Disconnect your network drive
- Don't forget your sample...
- Close all the doors of the OKOlab
- Turn off the touchpad
- Shut off the gas supply, check
- 3, 4, 5 small fuses to be switched off
- Possibly ventilate
- Switch off the fluorescent lamp
- In the small room: key + switches (we go up from the bottom)
- Computer shutdown
- Turn off the light
- If there is nobody around :-) lock the lab and take key to the gate