The Leica DMI6000 fluorescence microscope has a AxioCam MRc5 camera and 5 objectives (5x, 10x, 20x, 40x, 63x OIL).
Switch On
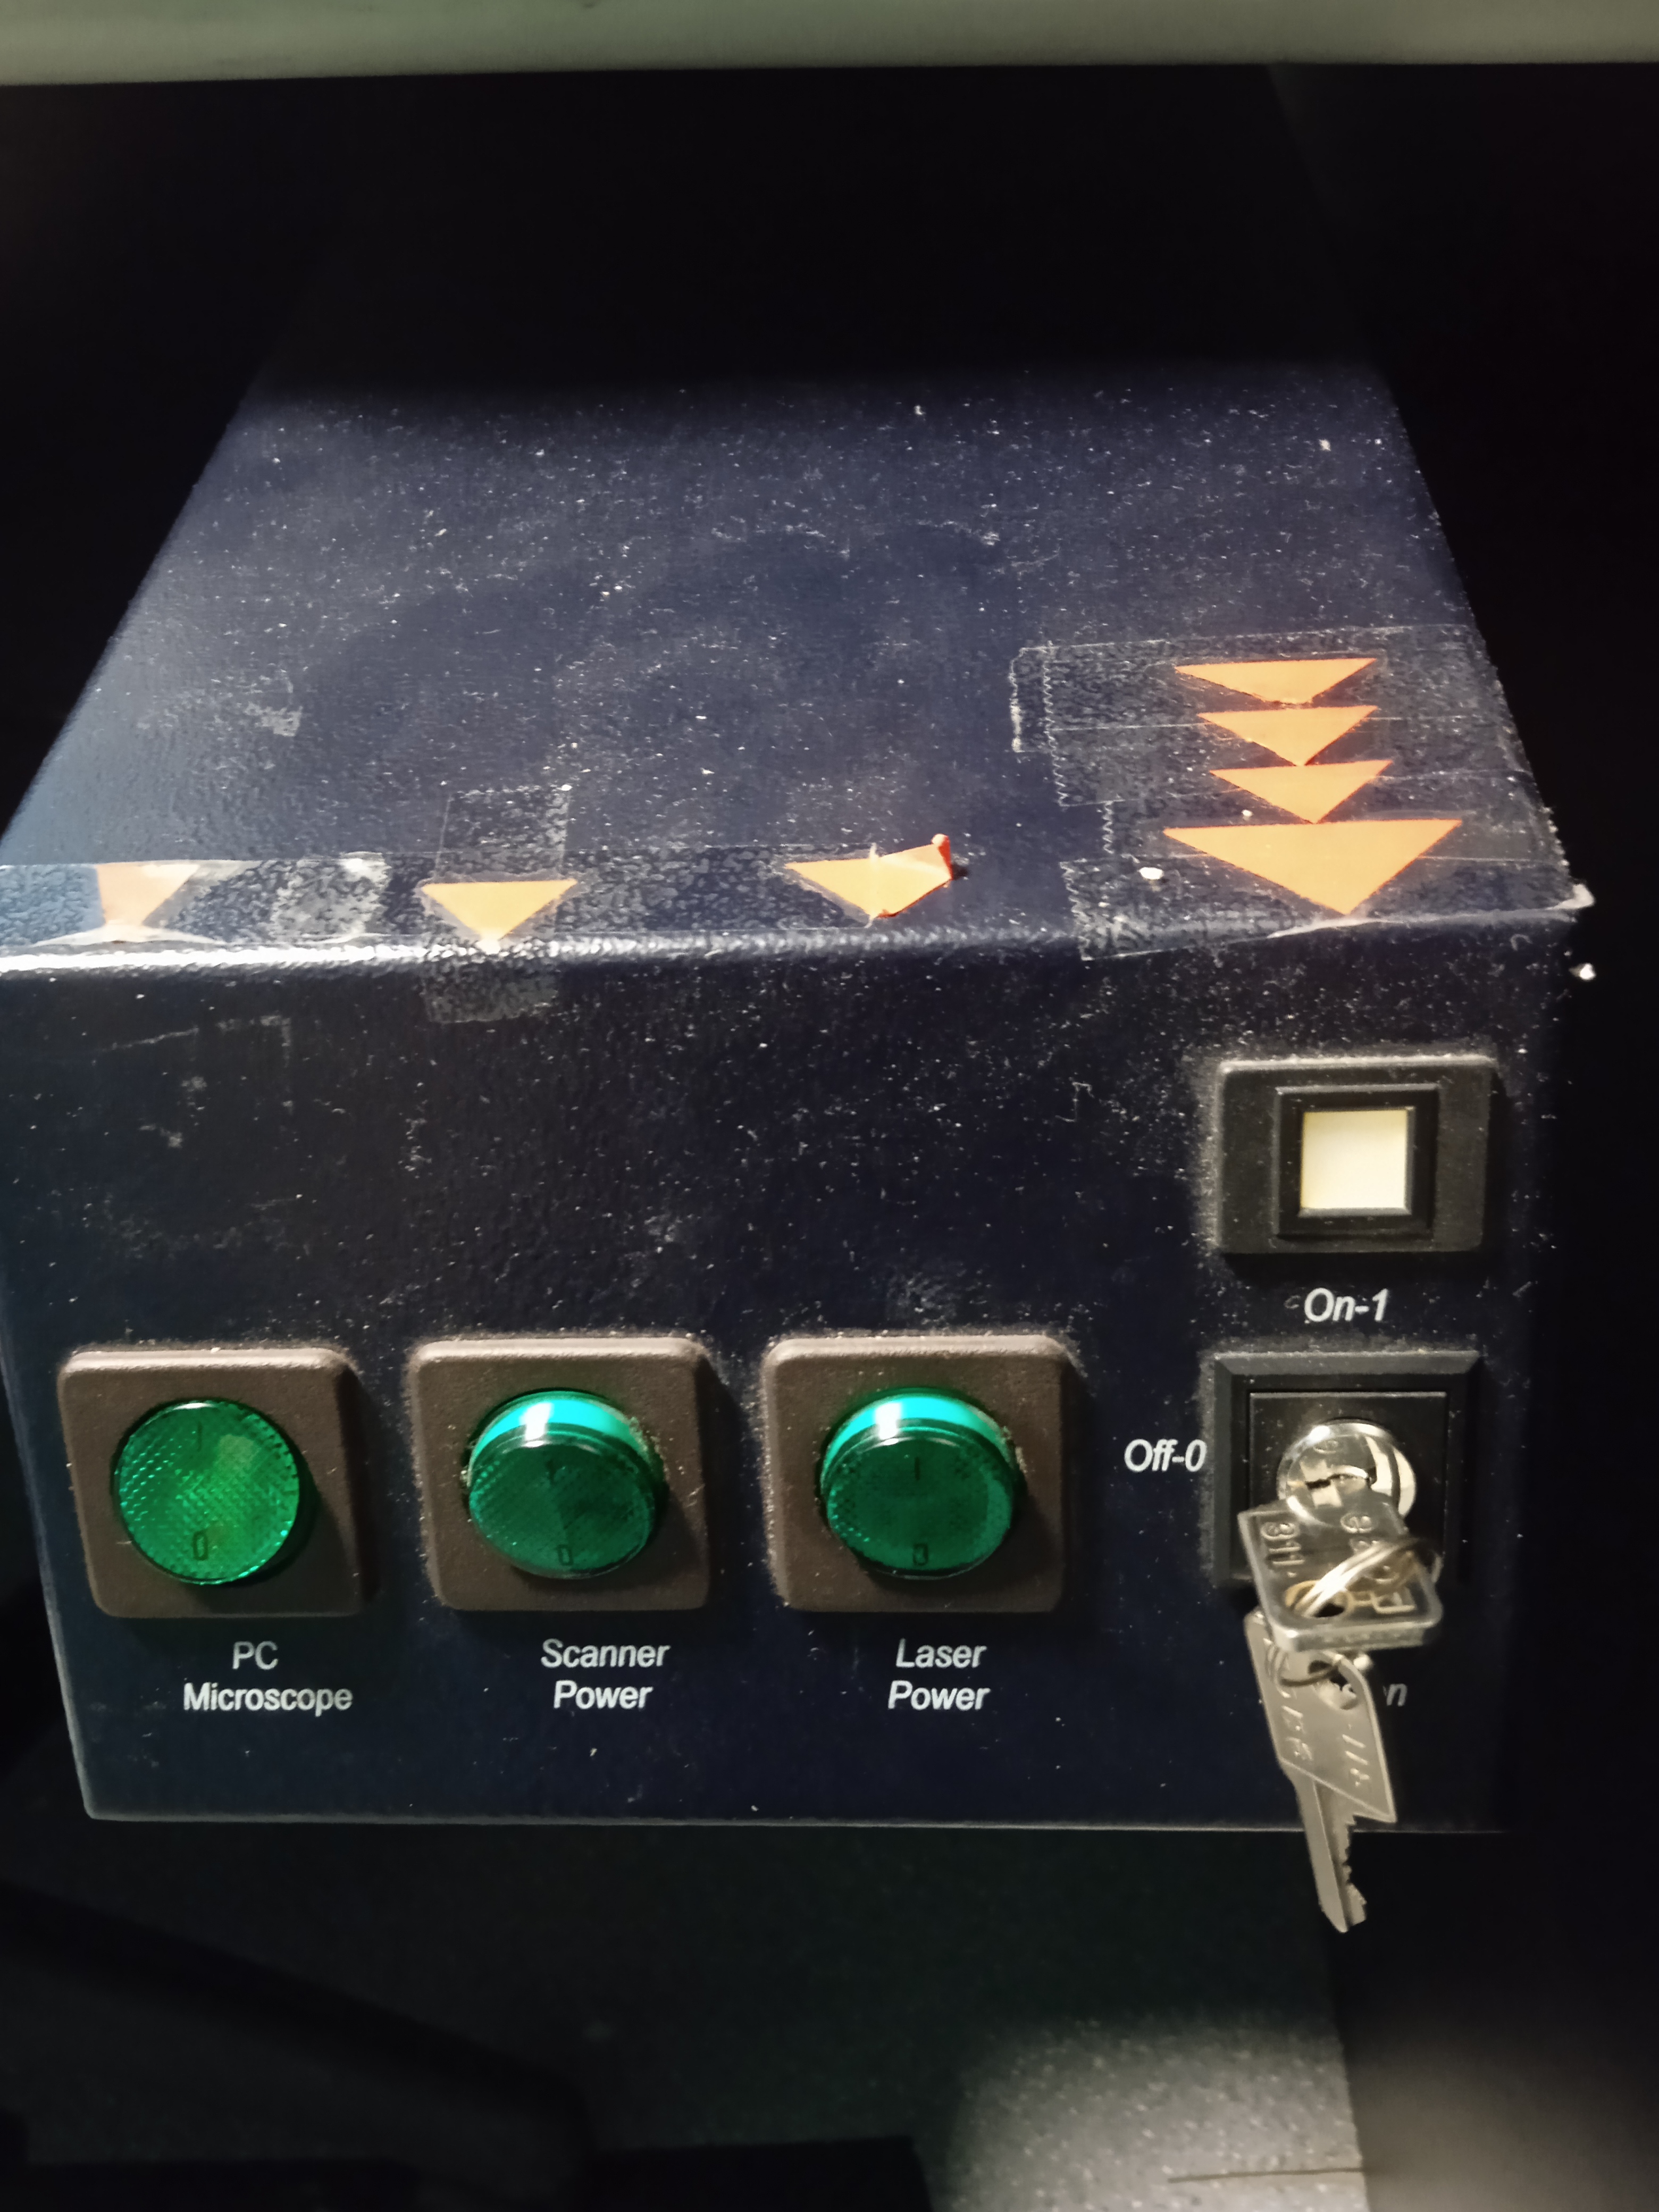
Switch on the first green button from left with PC/ Microscope sign. If the PC was not on, it takes a few minutes to restore the HDD.
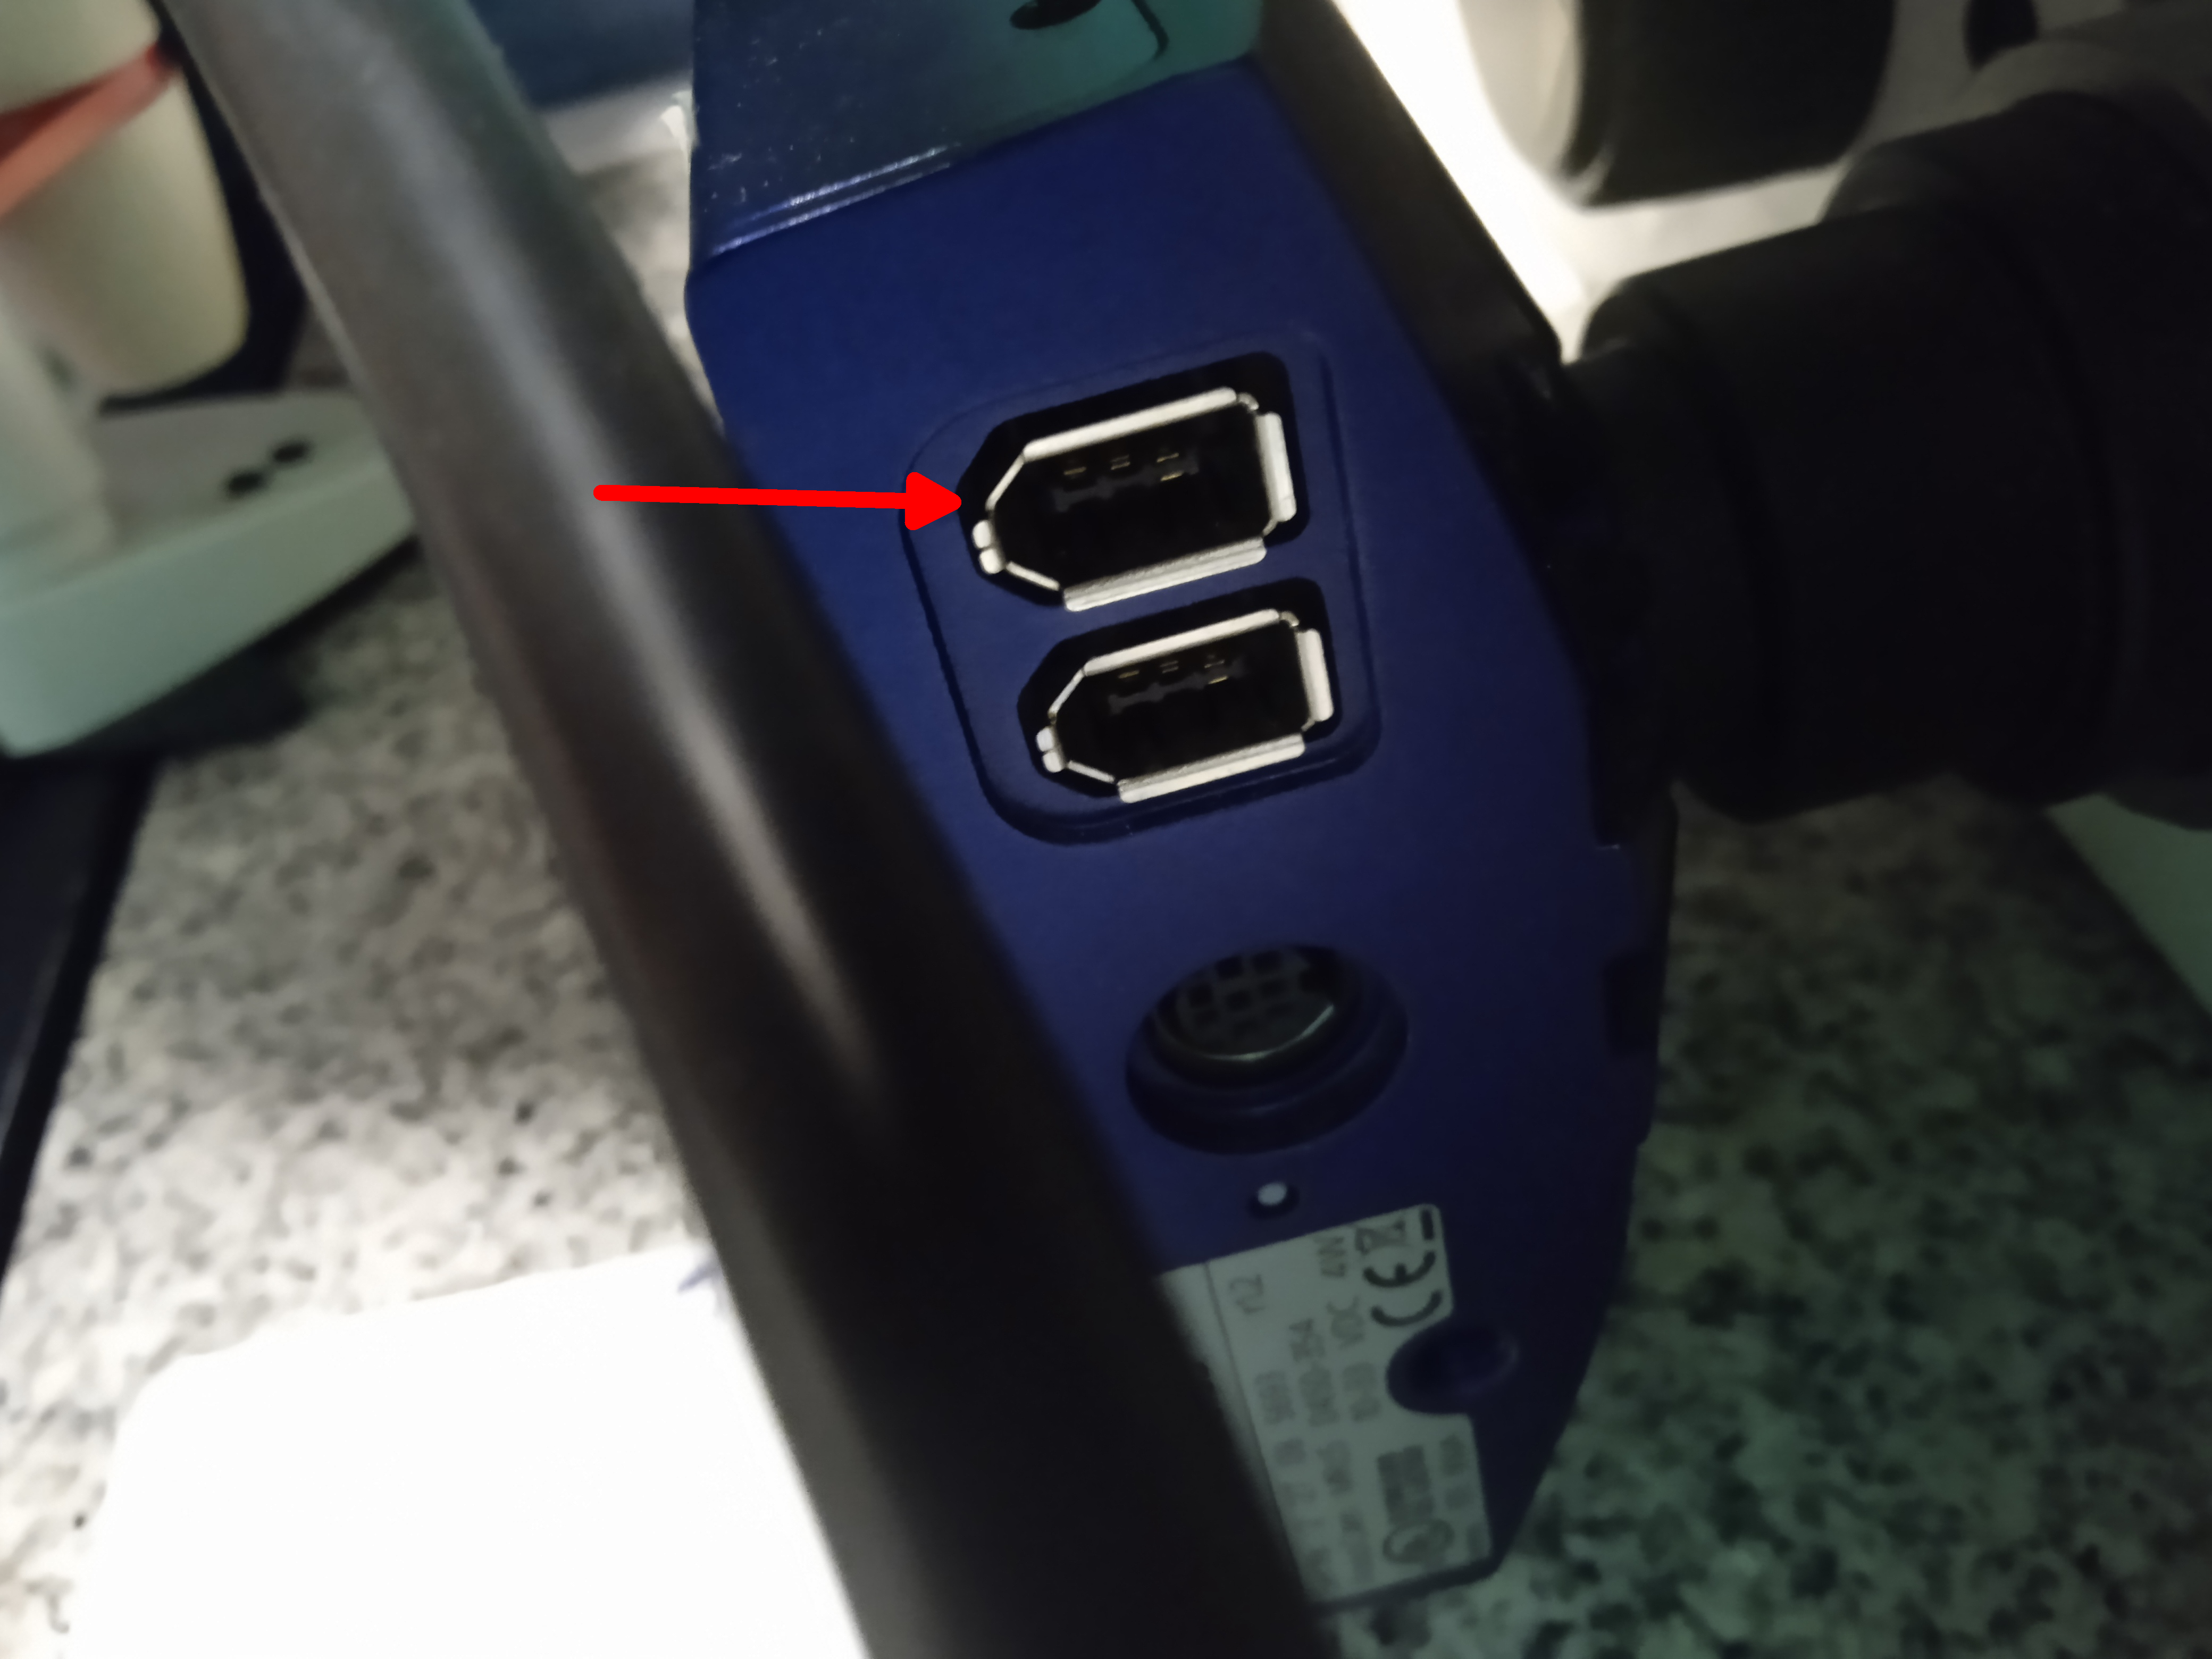
Plug in the cable into the first place from above behind the camera.
Switch it on, if you are planning to use the mercury lamp excitation.
Switch the microscope controller on (left box on the desk, under the small shelf).
Important! Before switching on the lamp...
Please, make sure, the lamp is not warm - look at the
ASOK reservation system, check its temperature,
ask us...
It is dangerous to switch a mercury lamp off and on!Switch the microscope controller on (left box on the desk, under the small shelf).
Login to windows (TCS User, no password)
Map your network drive (e.g. \\st1.brc\home or \\st18.brc\BOSSNAMEgr - "18" may be changed). Remember to write SAMDOM\ before your username. Please, don't store anything on this computer Login for using the microscope - this will enable the controller, and calculate your usage time.
Start the CAMERA SOFTWARE software from D:\@KAMERA
Image acquisition
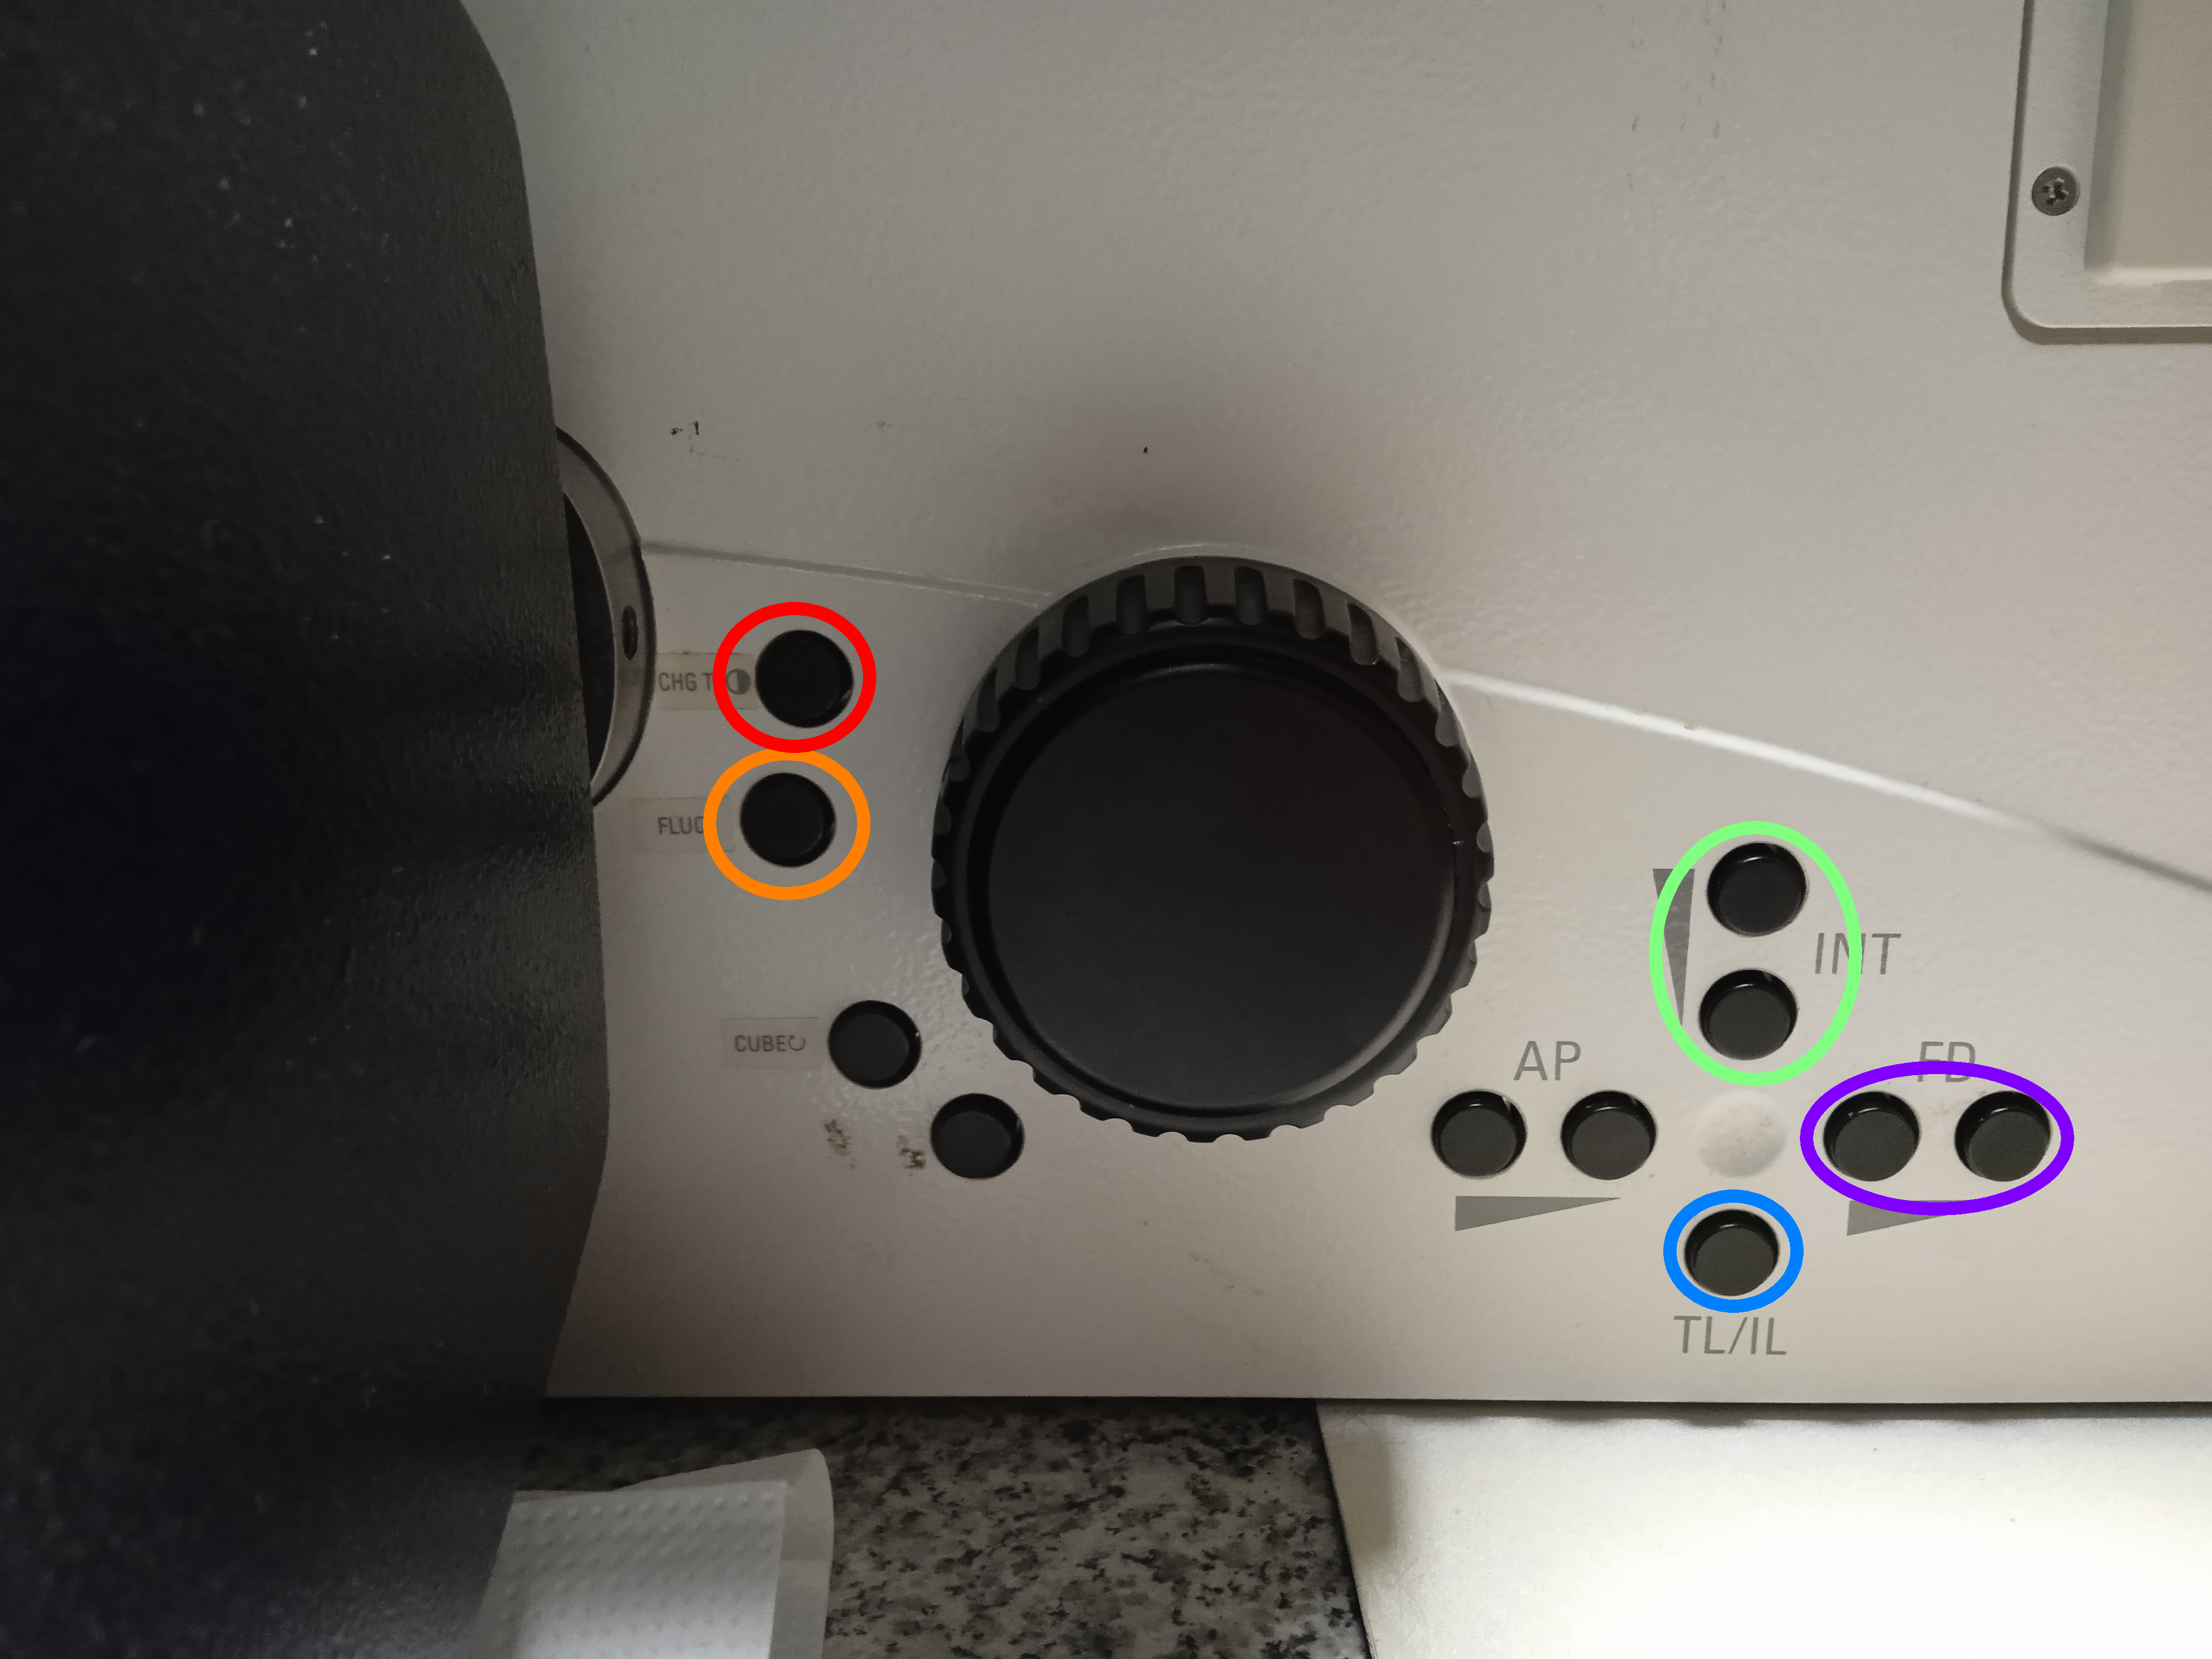
Button in red circle: switch to bright field mode.
Button in orange circle: switch between filter cubes in flourescence mode.
Buttons in green circle: change the halogen lamp intensity in bright field mode.
Buttons in purple circle: change the flourescence lamp "pinhole" in flourescence mode.
Button in blue circle: switch between flourescence mode and bright field mode
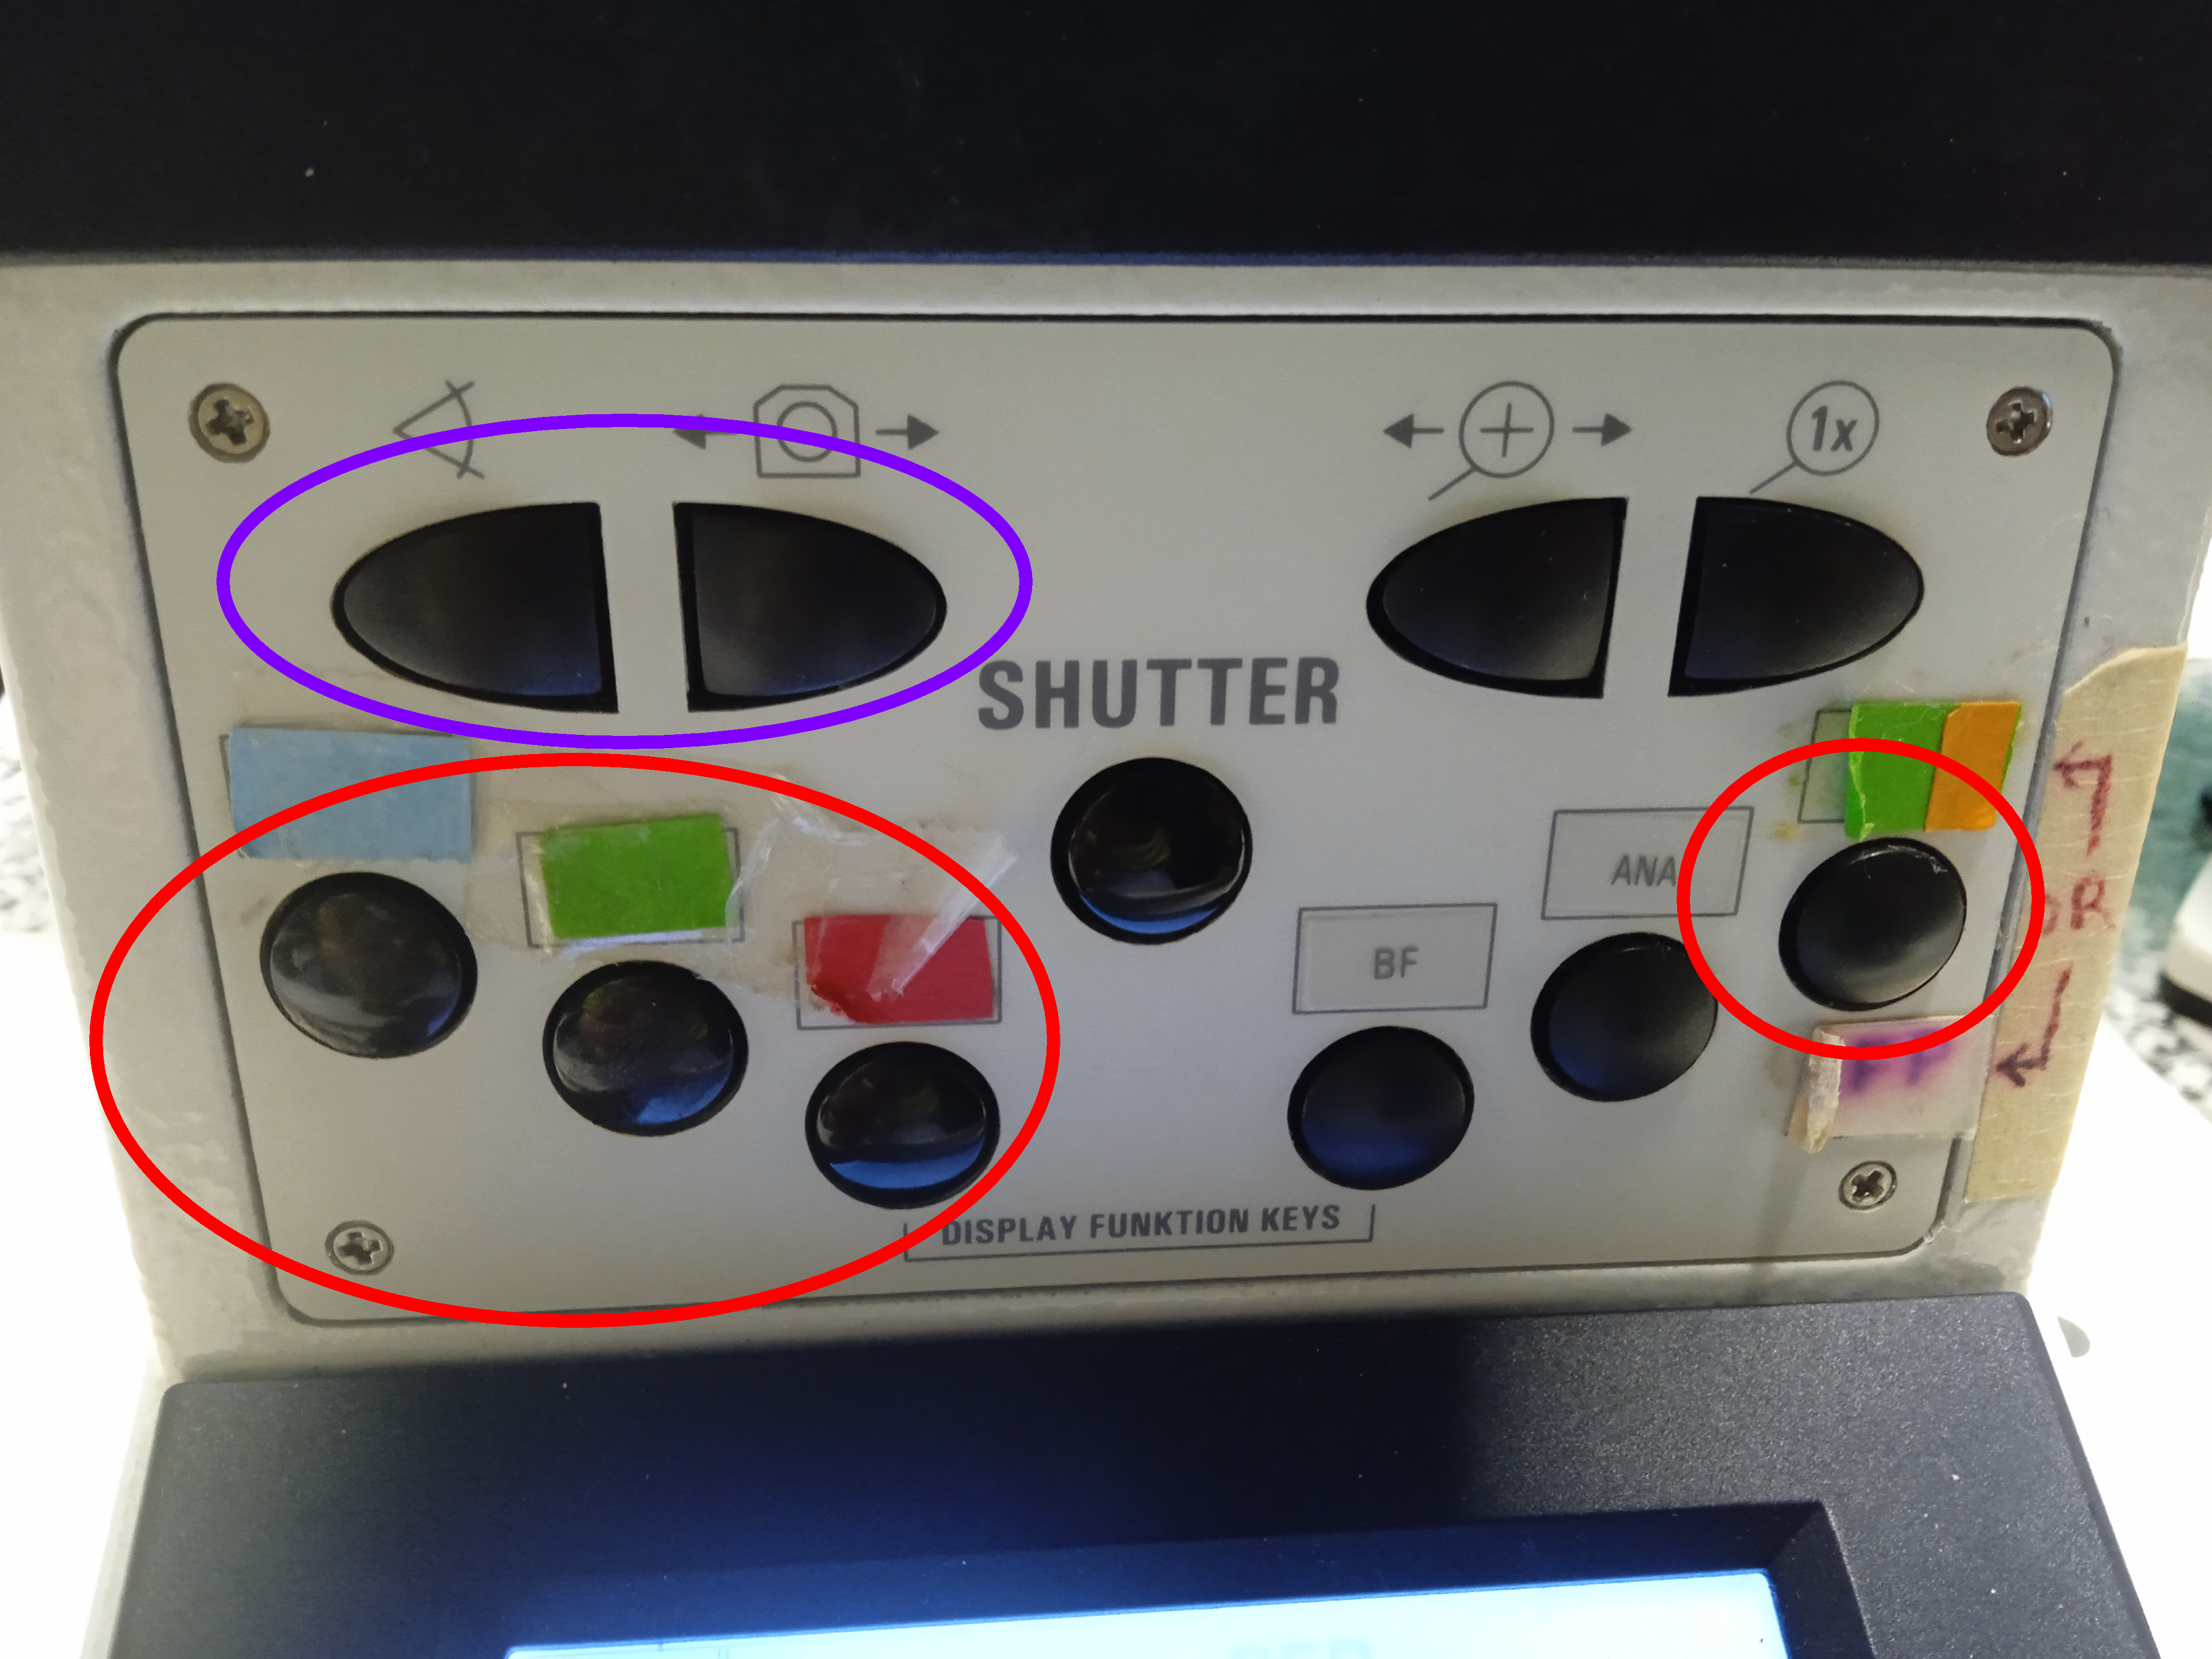
Buttons in red circles: switch between filter cubes in flourescence mode.
Buttons in purple circle: switch between eyepiece and camera.
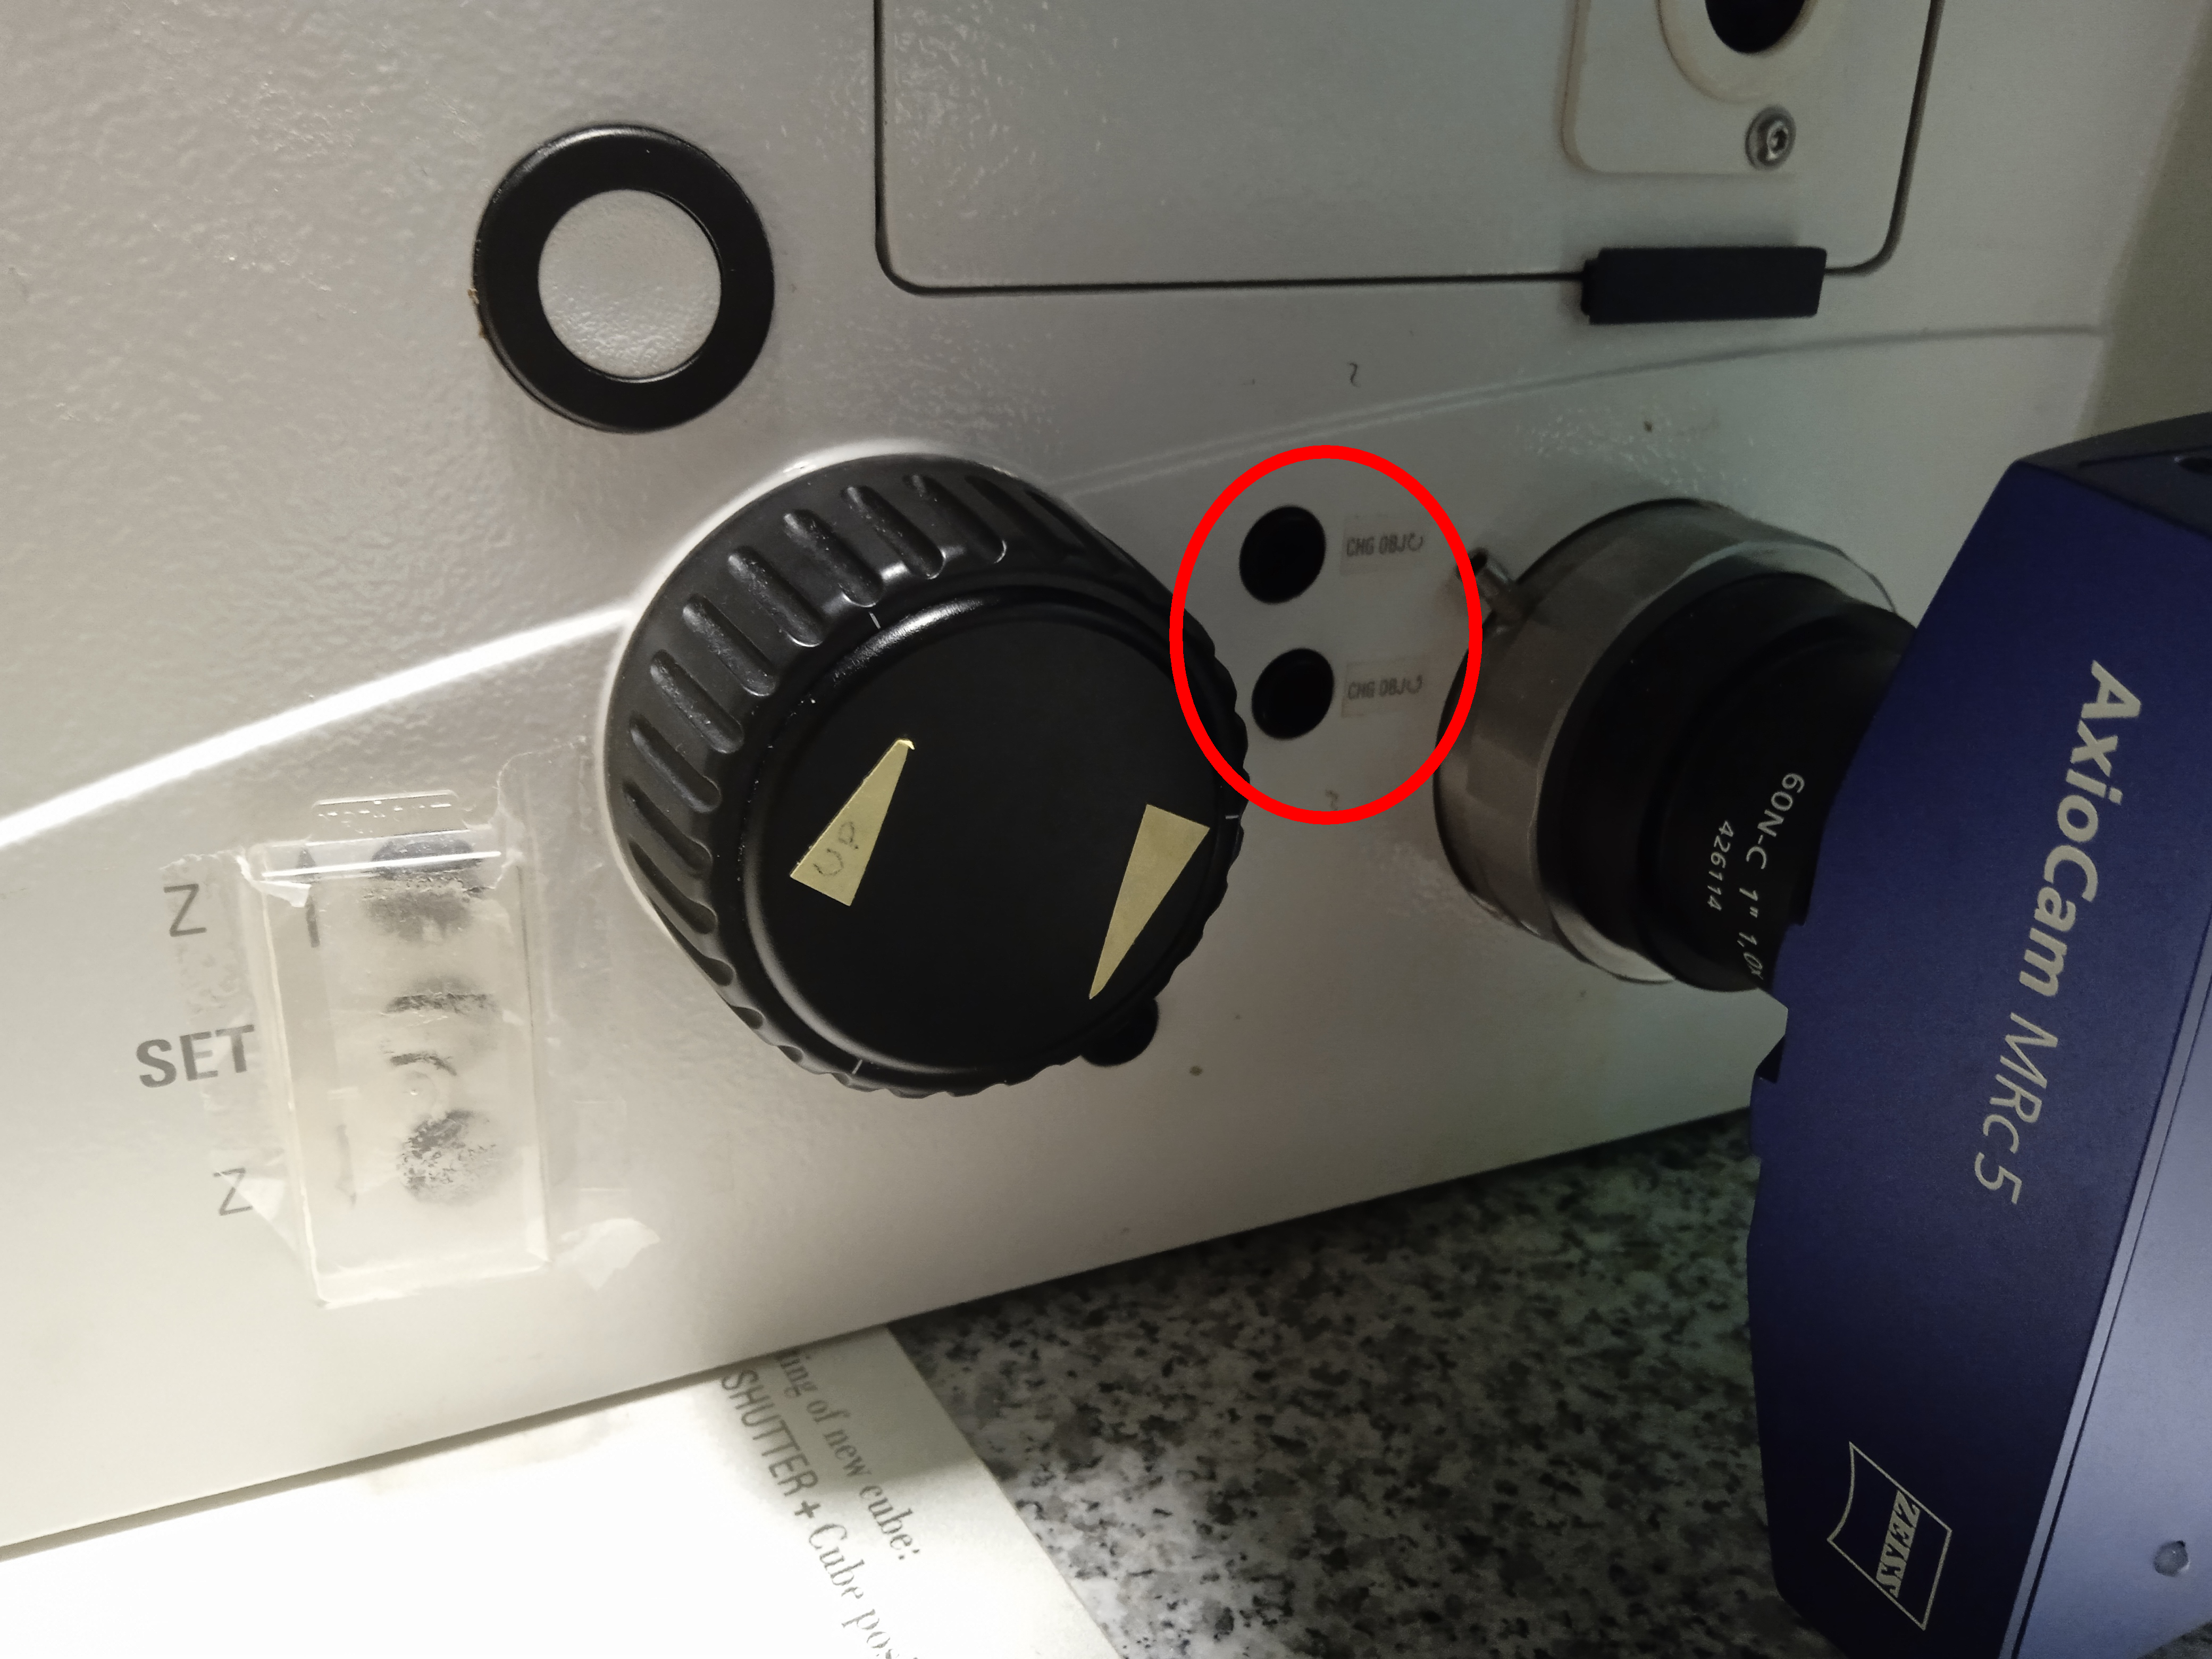
Buttons in purple circle: switch between air objectives.
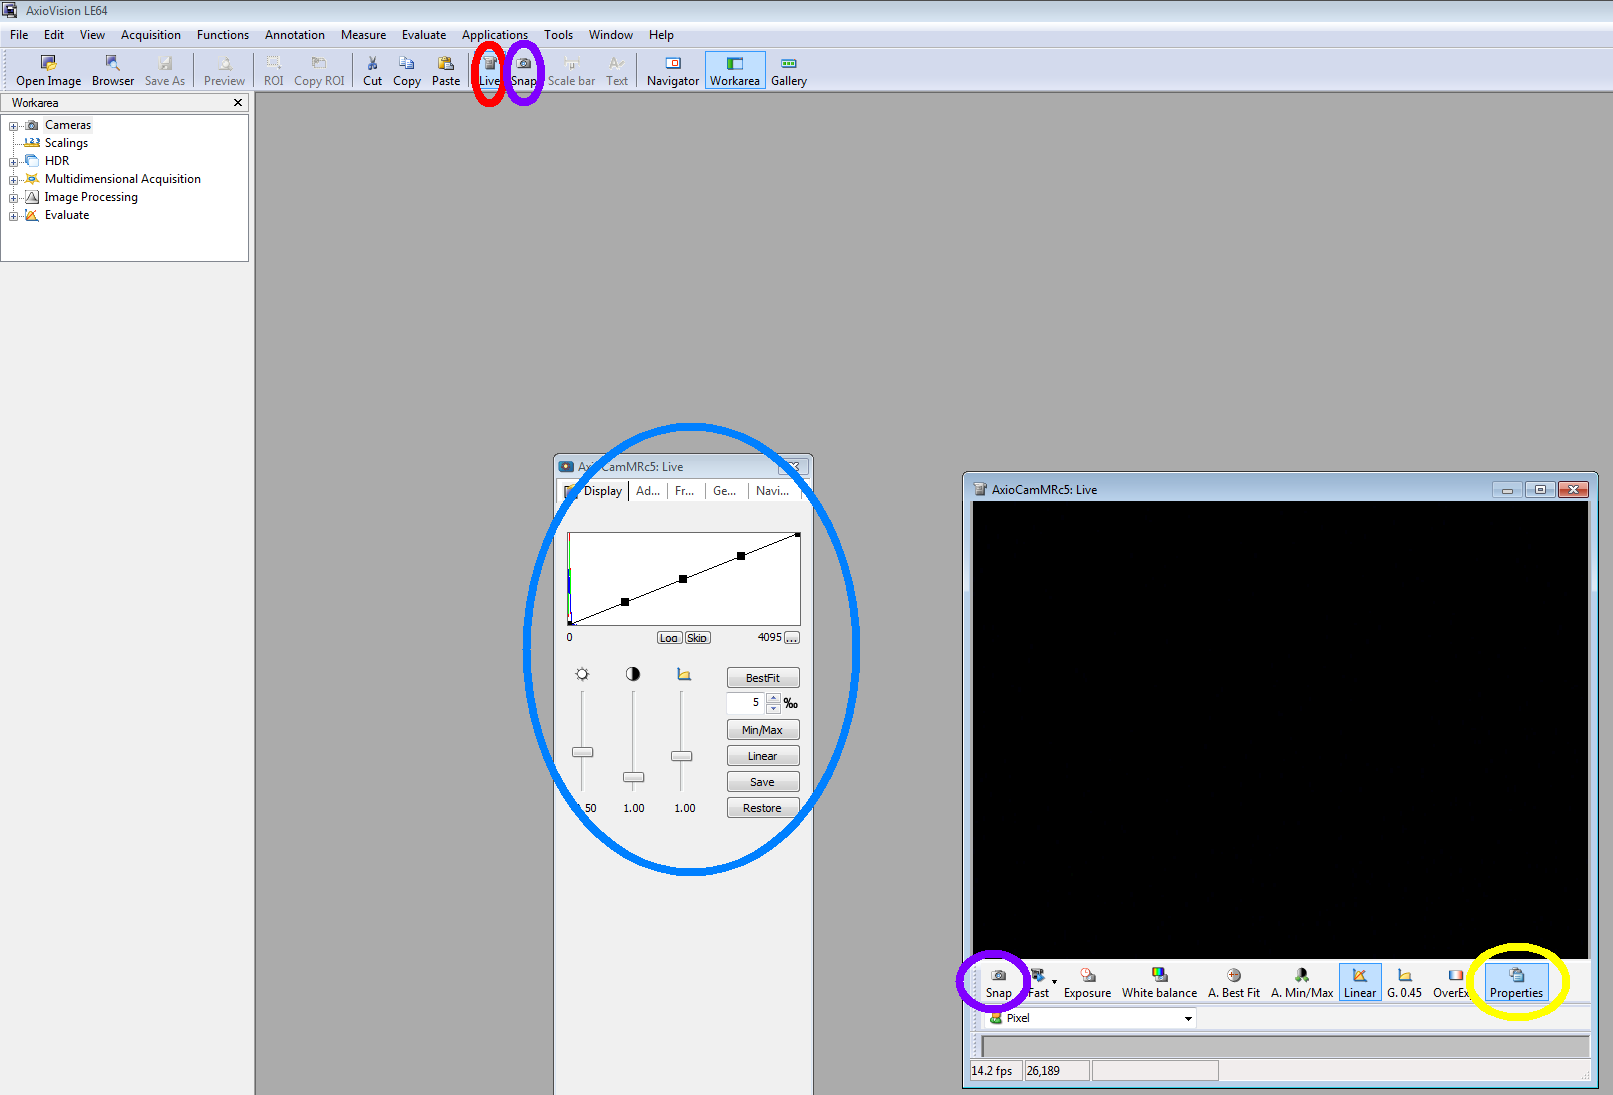
Button in red circle: switch on/off live mode.
Buttons in purple circles: take a photo.
In blue circle: you can change the histogram in live
Button in yellow circle: if it's not open, you can open a window for changing histogram and exposure time.
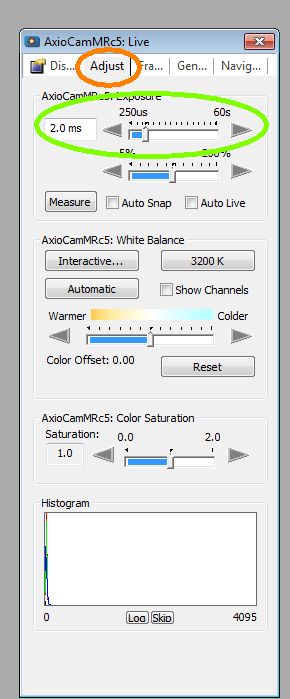
 Button in orange circle: switch between properties windows.
In green circle: you can set the exposure time.
Button in orange circle: switch between properties windows.
In green circle: you can set the exposure time.
Button in orange circle: switch between properties windows.
In green circle: you can set the exposure time.
If you need scale bar for your measurement, you find a 1 mm ruler in the ""D:\@KAMERA\scale" map for every objectives.
Leaving/Switching off - check the reservation
- Save your work to your network drive
- Clean the objective (if you've used oil) and select the 10x
- Exit from software
- "Turn off" the microscope login webpage
- Disconnect your network drive
- Switch back to eyepiece
- Disconnect the camera cable
- Remove the foil from the ocular and don't forget your sample...
Switch off the fluorescent lamp
- (Turn the laser key, if it is ON, then Wait for 5 minutes (use the timer), then Switch off the Laser Power button (rightmost))
- (Switch off the Scanner Power as well, if it is still ON)
- Shut down windows.
- Switch off the PC / Microscope green button.
- Switch off the Controller.
- Cover the microscope - make sure, it doesn't touch the hot mercury lamp!
- Turn off the light.
- If there is nobody around :-) lock the lab and take the key to the gate.