The Leica TCS SP5 Confocal Microscope has 8 laser lines (405, 458, 476, 488, 496, 514, 543 and 633 nm) and 6 objectives (5x, 10x, 20x, 40x, 63x OIL). AOBS (Acousto Optical Beam Splitter) is used to separate the excitation from emission light.
Scanning confocal, simulteanous 3 color detection, 3 spectral detectors transmission mode, AOBS system.
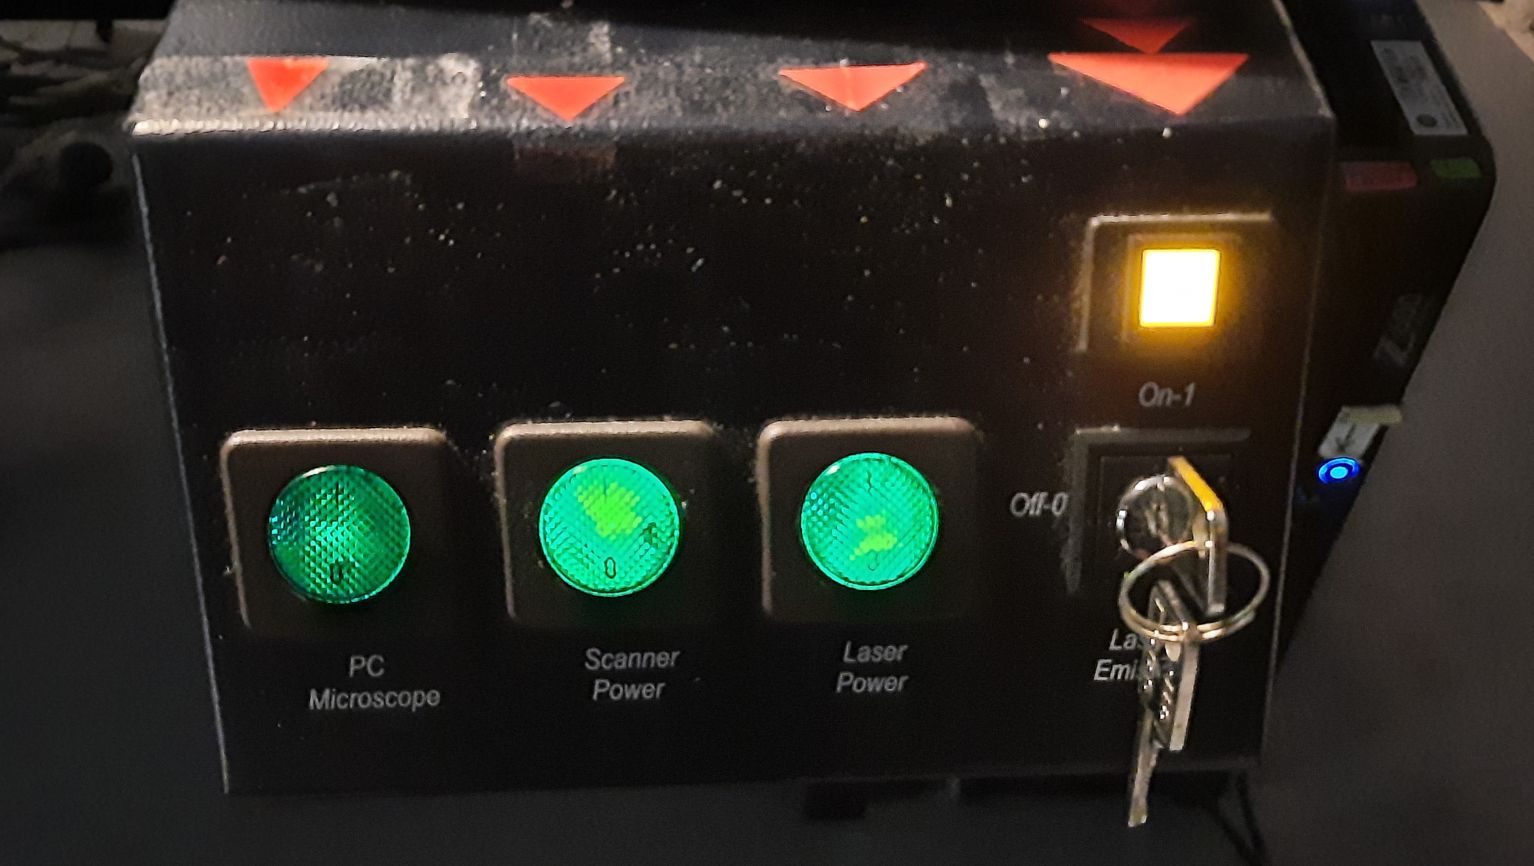
Switch On
To start the power on sequence, use the green buttons from left to right. Don't forget
the key as well! That is why it is marked by the red arrows...
(If the PC was not on, it takes a few minutes to restore the HDD.) Login to windows (TCS User, no password).
(If the PC was not on, it takes a few minutes to restore the HDD.) Login to windows (TCS User, no password).
Switch the fluorescent lamp on (right box on the desk), if you are planning to use the mercury lamp excitation and ocular. This lamp is
independent of the laser excitation and confocal acquisition. It is very useful to make sure that the
staining is OK. (It happens: you see nothing, and it is just because of the bad laser/channel
settings.)
Switch the microscope controller on (left box on the desk, under the small shelf).
Important! Before switching on the lamp...
Please, make sure, the lamp is not warm - look at the
ASOK reservation system, check its temperature,
ask us...
It is dangerous to switch a mercury lamp off and on!
Switch the microscope controller on (left box on the desk, under the small shelf).
Map your network drive (e.g. \\st1.brc\home or \\st18.brc\BOSSNAMEgr - "18" may be changed). Remember to write SAMDOM\ before your username. Please, don't store anything on this computer
Login for using the microscope.
Start the LAS-AF software (be patient ;-) ), and for the popup question, answer OK!
Start the LAS-AF software (be patient ;-) ), and for the popup question, answer OK!
Initialize
In case of matrix measurement you (the program...) need(s) to know the exact position of the stage. If
you answer yes for the popup, it will move the stage to every direction for a while. In the most
cases,
you don't need this.
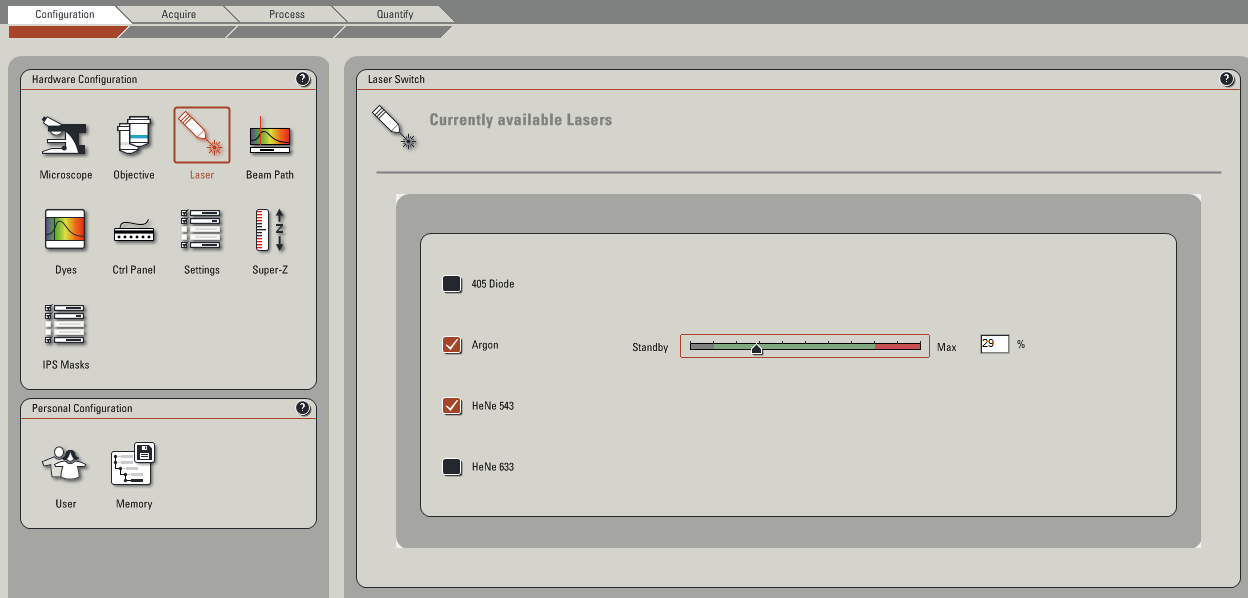 Switch on the lasers you are going to use. Set the Ar-ion laser to 20%. If a laser is not going to be
used for the next 2 hours, please switch it off.
Switch on the lasers you are going to use. Set the Ar-ion laser to 20%. If a laser is not going to be
used for the next 2 hours, please switch it off.
(All of these settings are restored to default, you have to do them again every time.)
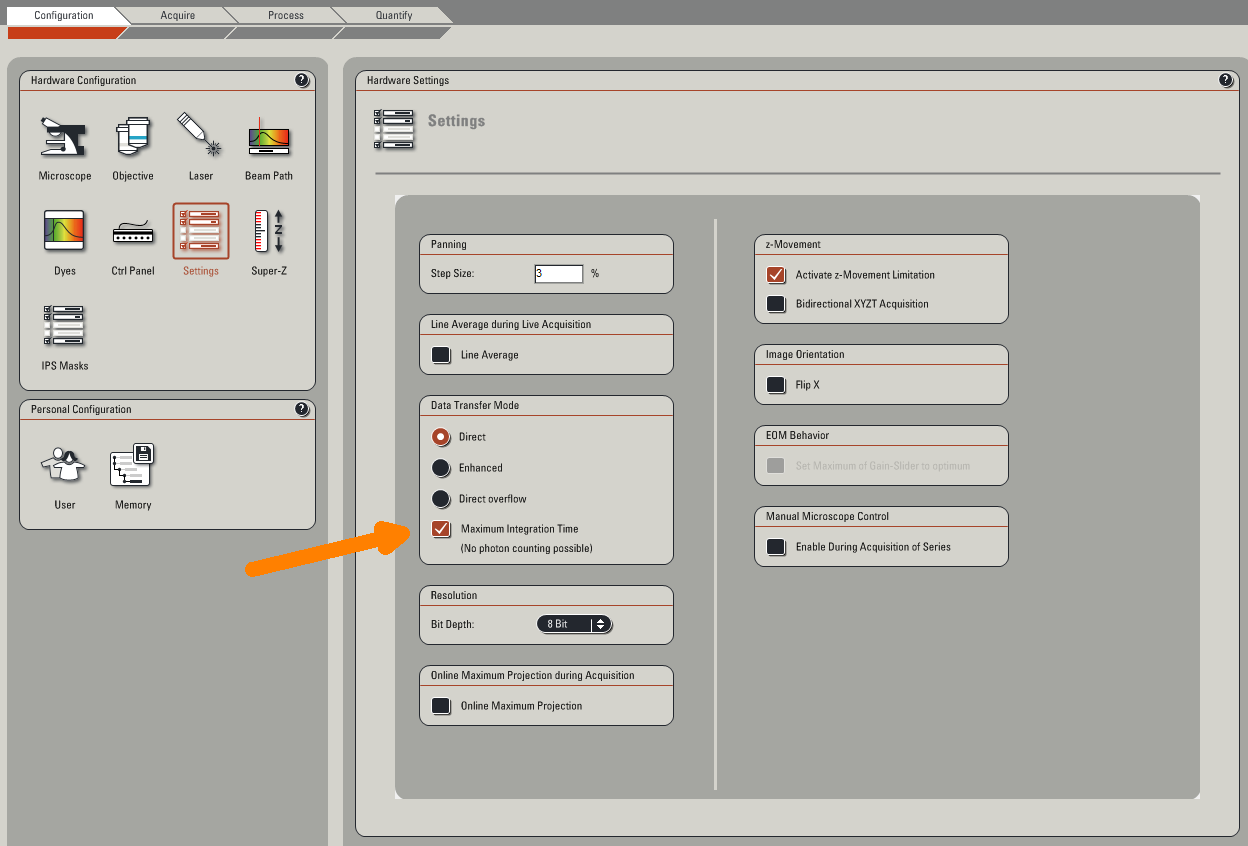
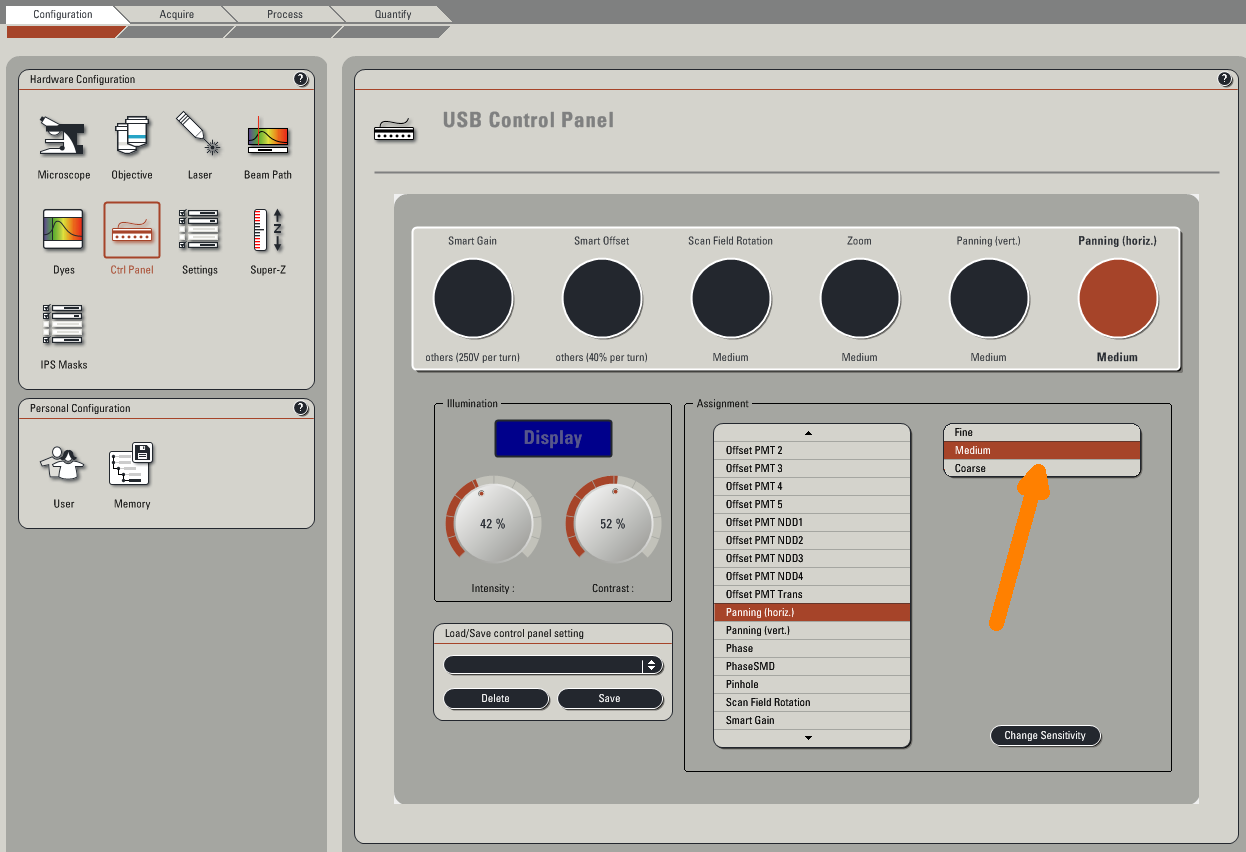
1/ Click in the Settings the Max Integration Time checkbox (in order to avoid some annoying green lines on your image - yes, it's a bug).
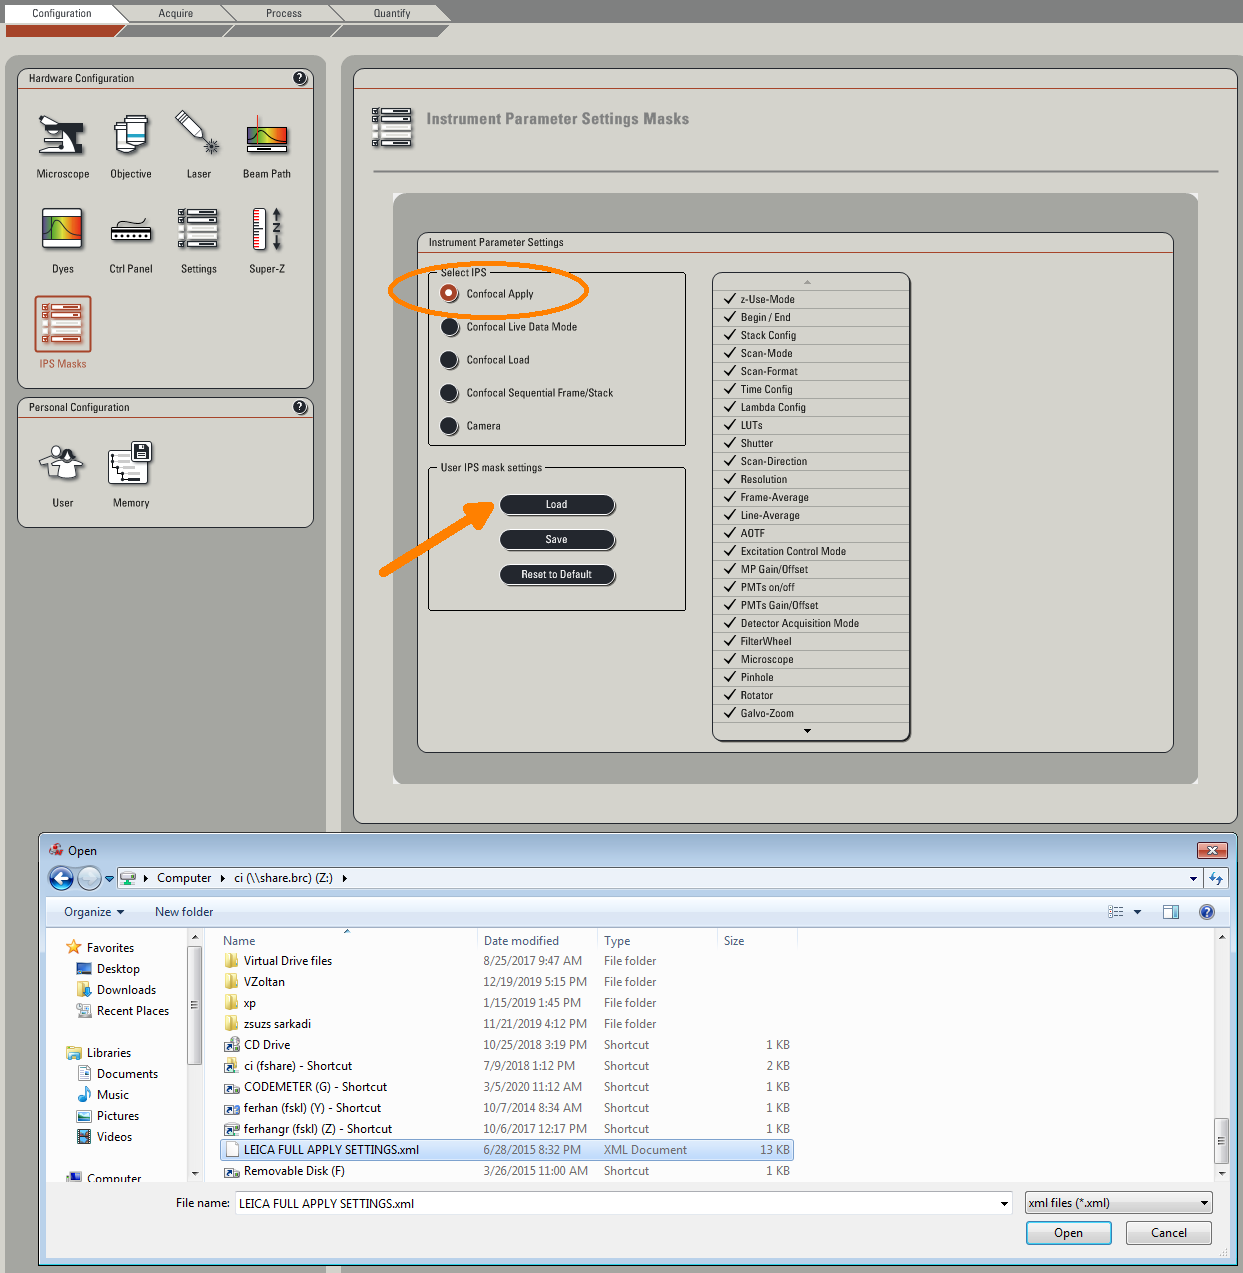
 2/ Load the configuration file for reusing acquisition parameters. (It is in IPS Marks.) You
can reload all your previous measurement parameters from an old image.
2/ Load the configuration file for reusing acquisition parameters. (It is in IPS Marks.) You
can reload all your previous measurement parameters from an old image.
 3/ You can modify the functions of the control knobs, e.g. the sensitivity of the pan to medium. (Pan
is an excellent and gentle way for moving
your viewport in case you are using zoom.)
3/ You can modify the functions of the control knobs, e.g. the sensitivity of the pan to medium. (Pan
is an excellent and gentle way for moving
your viewport in case you are using zoom.)
1/ Click in the Settings the Max Integration Time checkbox (in order to avoid some annoying green lines on your image - yes, it's a bug).
2/ Load the configuration file for reusing acquisition parameters. (It is in IPS Marks.) You
can reload all your previous measurement parameters from an old image.
3/ You can modify the functions of the control knobs, e.g. the sensitivity of the pan to medium. (Pan
is an excellent and gentle way for moving
your viewport in case you are using zoom.)
Image acquisition
Confocal acquisition will show just a thin layer of the sample - use
- conventional transmission/fluorescence
- laser scanning transmission
- bigger pinhole
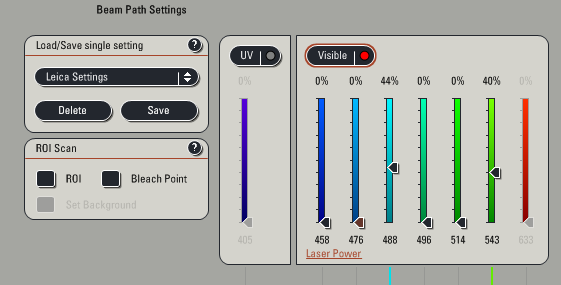
Enable the proper laser group. Set ~20%-40% laser power of the line that is suitable for your dye.
AOBS will do the job of a dichroic filter automatically.
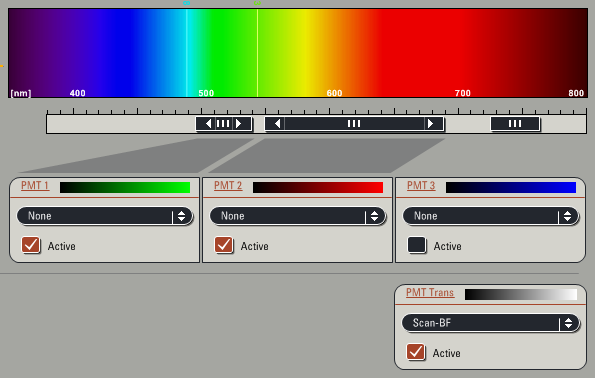
You have to consider the optimal width for the fluorescence emission. The common dye spectra are
stored in the program, they can be displayed (but you have to set the proper range).
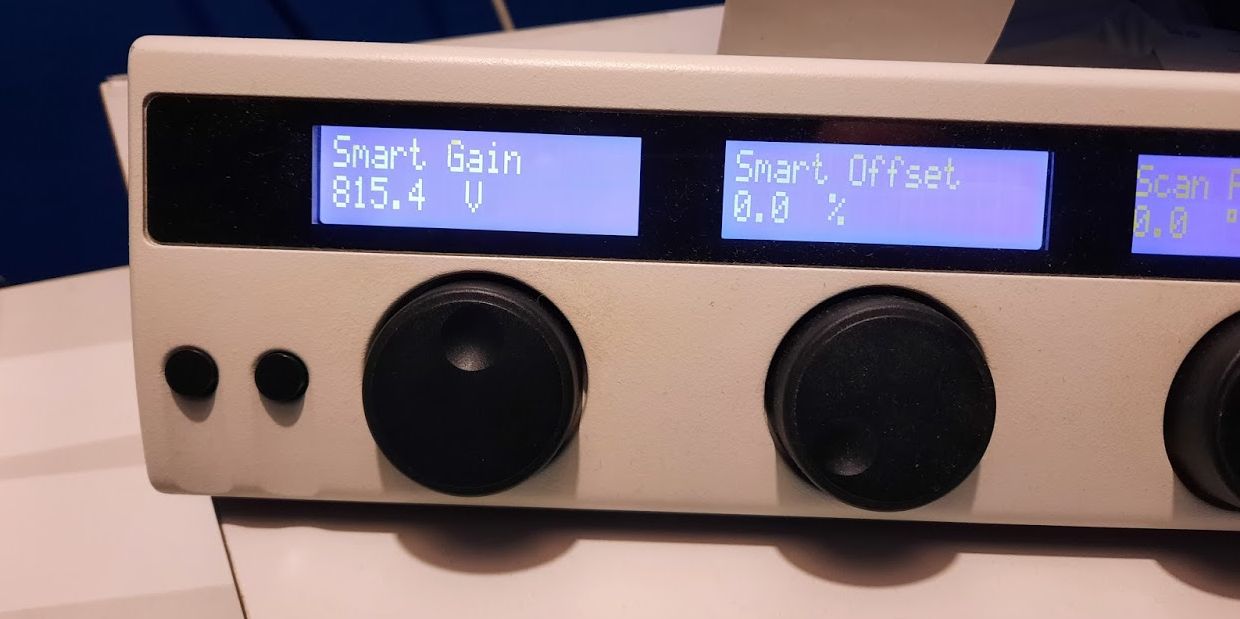
Smart Gain sets the active channel's (selected on the right window) sensitivity. Golden rule is ~800
V.
 Check the overloaded pixels by using the Quick LUT option not to have blue (overloaded) pixels.
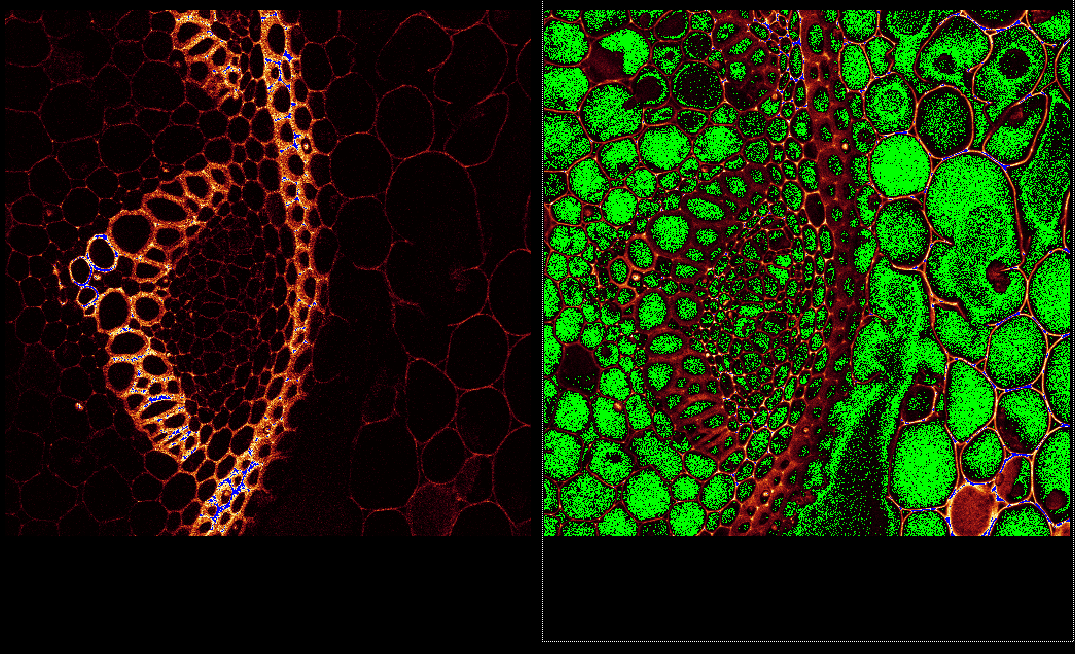
Check the overloaded pixels by using the Quick LUT option not to have blue (overloaded) pixels.
Functions/modes
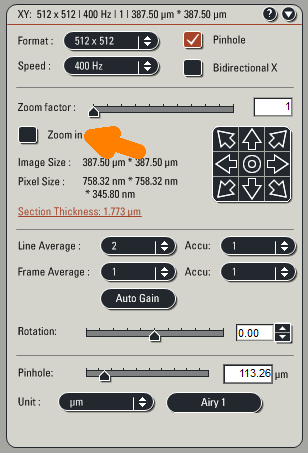
Use Zoom factor or Zoom in checkbox instead of the control knob.
Mind the physical resolution - more than 5x-10x zoom will not provide more details! (See the
table...)
Always use Z-Wide instead of Galvo. Using system-optimized steps is recommended (if you are patient
enough...)
During Live scan set the end positions. In the middle set the best intensities. Launch the acquisition by the Start button instead of the Capture Image.
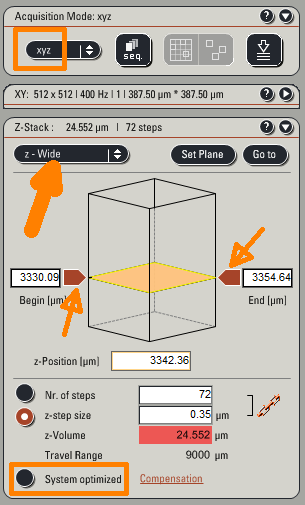
During Live scan set the end positions. In the middle set the best intensities. Launch the acquisition by the Start button instead of the Capture Image.
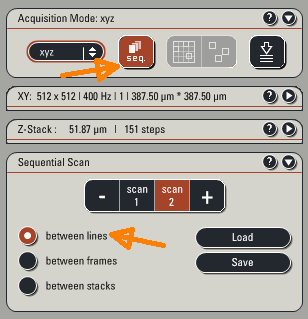
Use between lines if it is possible. (In this mode the channel parameters must be the same,
but it is safe for colocalization.)
If you need different emission wavelengths, use between frames mode (and make sure that your
sample is rock stable...) In this case the
Live and the Capture Image acquire just the active sequence.
For this you need stage initialization - if you missed it, you have to restart the software.
Leaving/Switching off - check the reservation
- Save your work - if you need, export the images to TIFF format - to your network drive
Do not use SAVE ALL function - Clean the objective (if you've used oil) and select the 10x
- Exit LAS-AF software
- "Turn off" the microscope login webpage
- Disconnect your network drive
- Remove the foil from the ocular and don't forget your sample...
- Switch off the fluorescent lamp
- Turn the laser key
- Wait for 5 minutes (use the timer)
- Switch off the Laser Power button (rightmost)
-
Turn off the control box (left).
- Shut down windows.
- Switch off the Scanner Power and the PC / Microscope green buttons as well.
- Cover the microscope - make sure, it doesn't touch the hot mercury lamp!
- Turn off the light.
- If there is nobody around :-) lock the lab and take the key to the gate.